Creating a Risk Assessment
Getting Started
1. From your dashboard, select Create Risk Assessment.
2. Then, click on Create New Risk Assessment.
3. You can choose from a list of pre-built risk assessment templates you have access to. You can find specific templates by using the department filters or search function.


The exact content of the risk assessment will depend on the template that was chosen, but you will see some or all of the following sections:
Essential Information
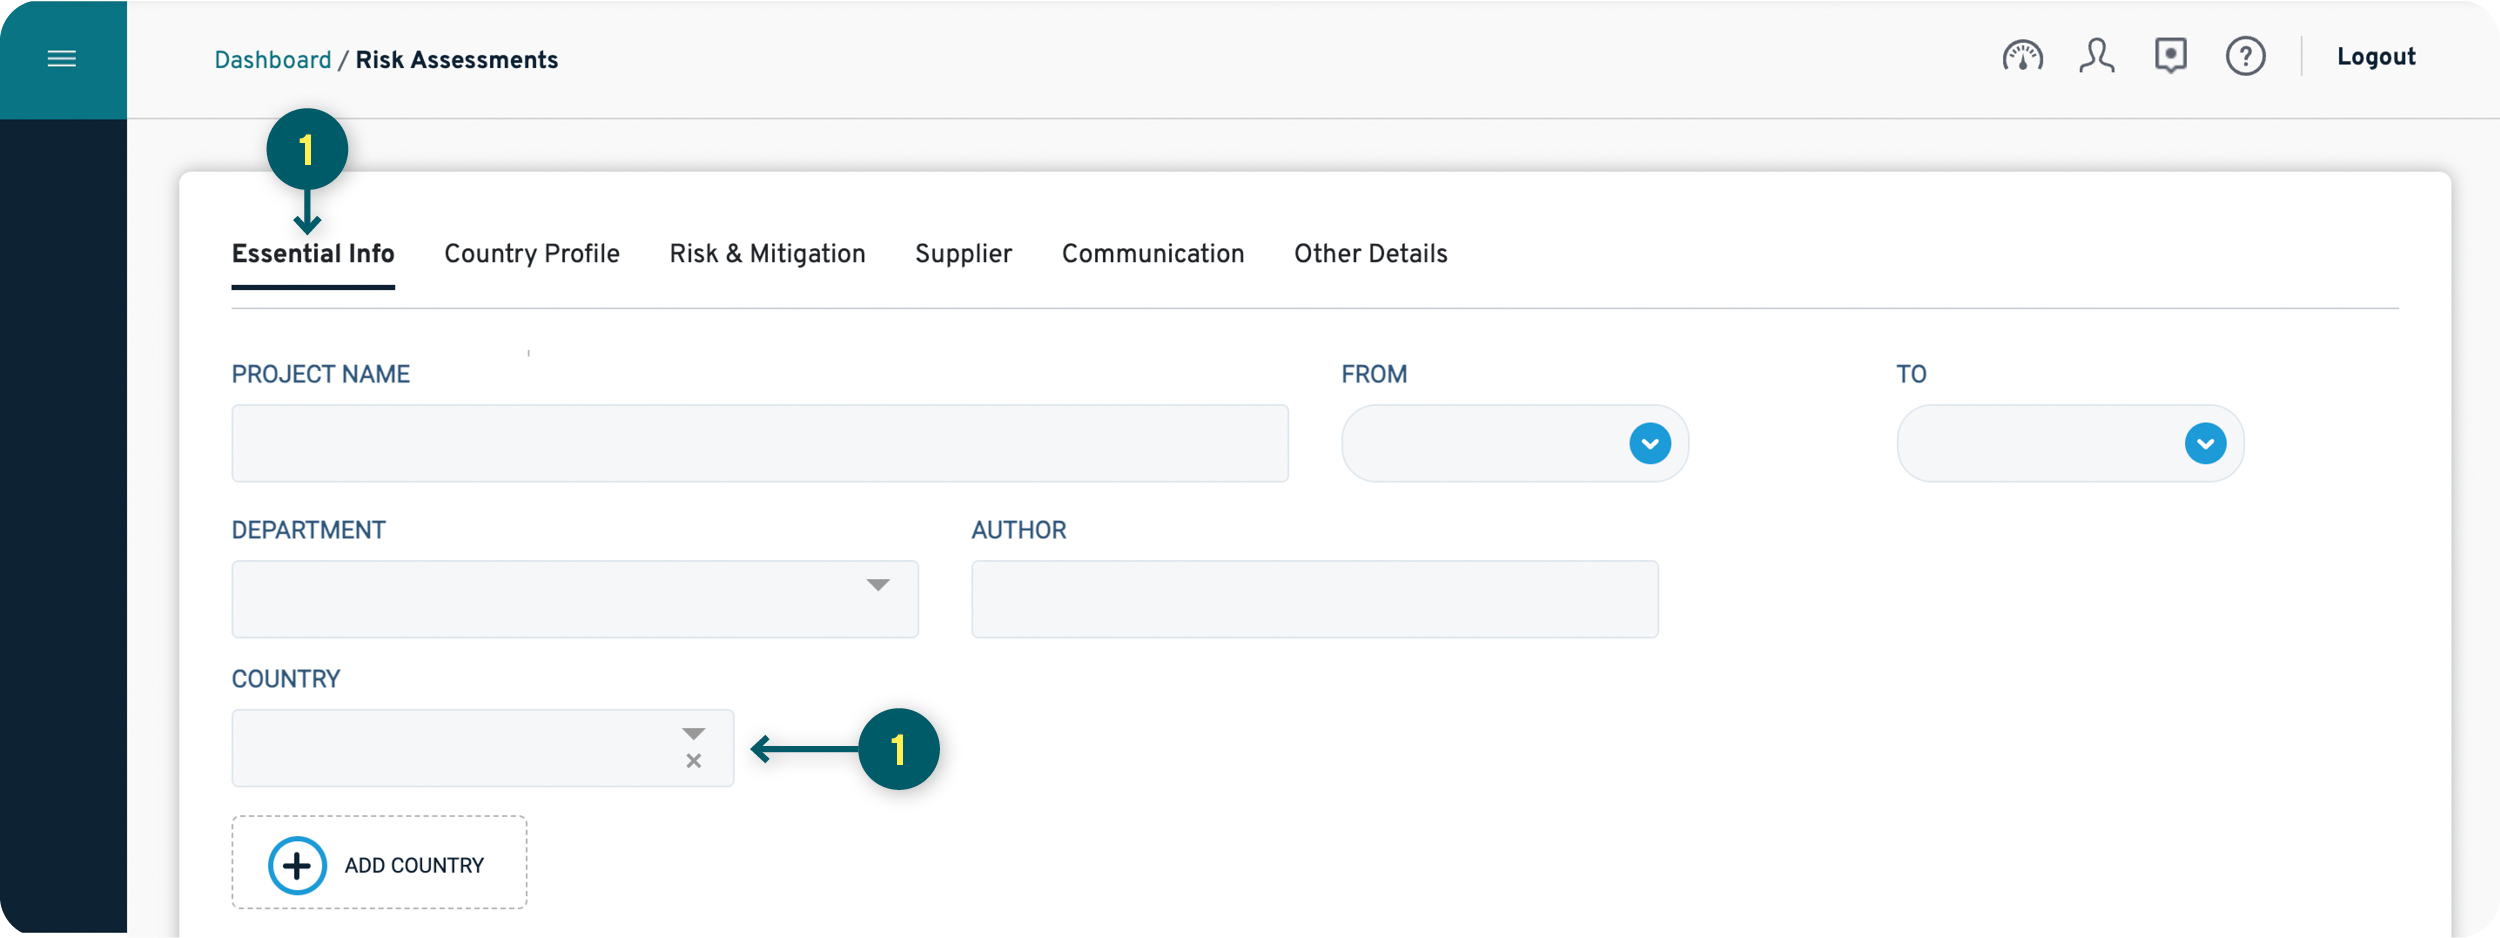
1. The first page, the Essential Info page, contains the most vital information. RiskPal auto-populates the Author field with your information. You need to fill out the project name, dates, department, and select one or more countries from the dropdown menu. You can add up to 5 countries.
2. Add project members and, if you are working with third parties or contractors who don’t have RiskPal access, you can include them too.
3. Choose an Approving Manager from the dropdown menu. You can also choose to add other managers and contributors who can edit but cannot approve the risk assessment. Enter the details of the project or assignment that you are working on in the different fields.
4. You can add Attachments at the bottom of the page if required.
5. Press the button to create a risk assessment.

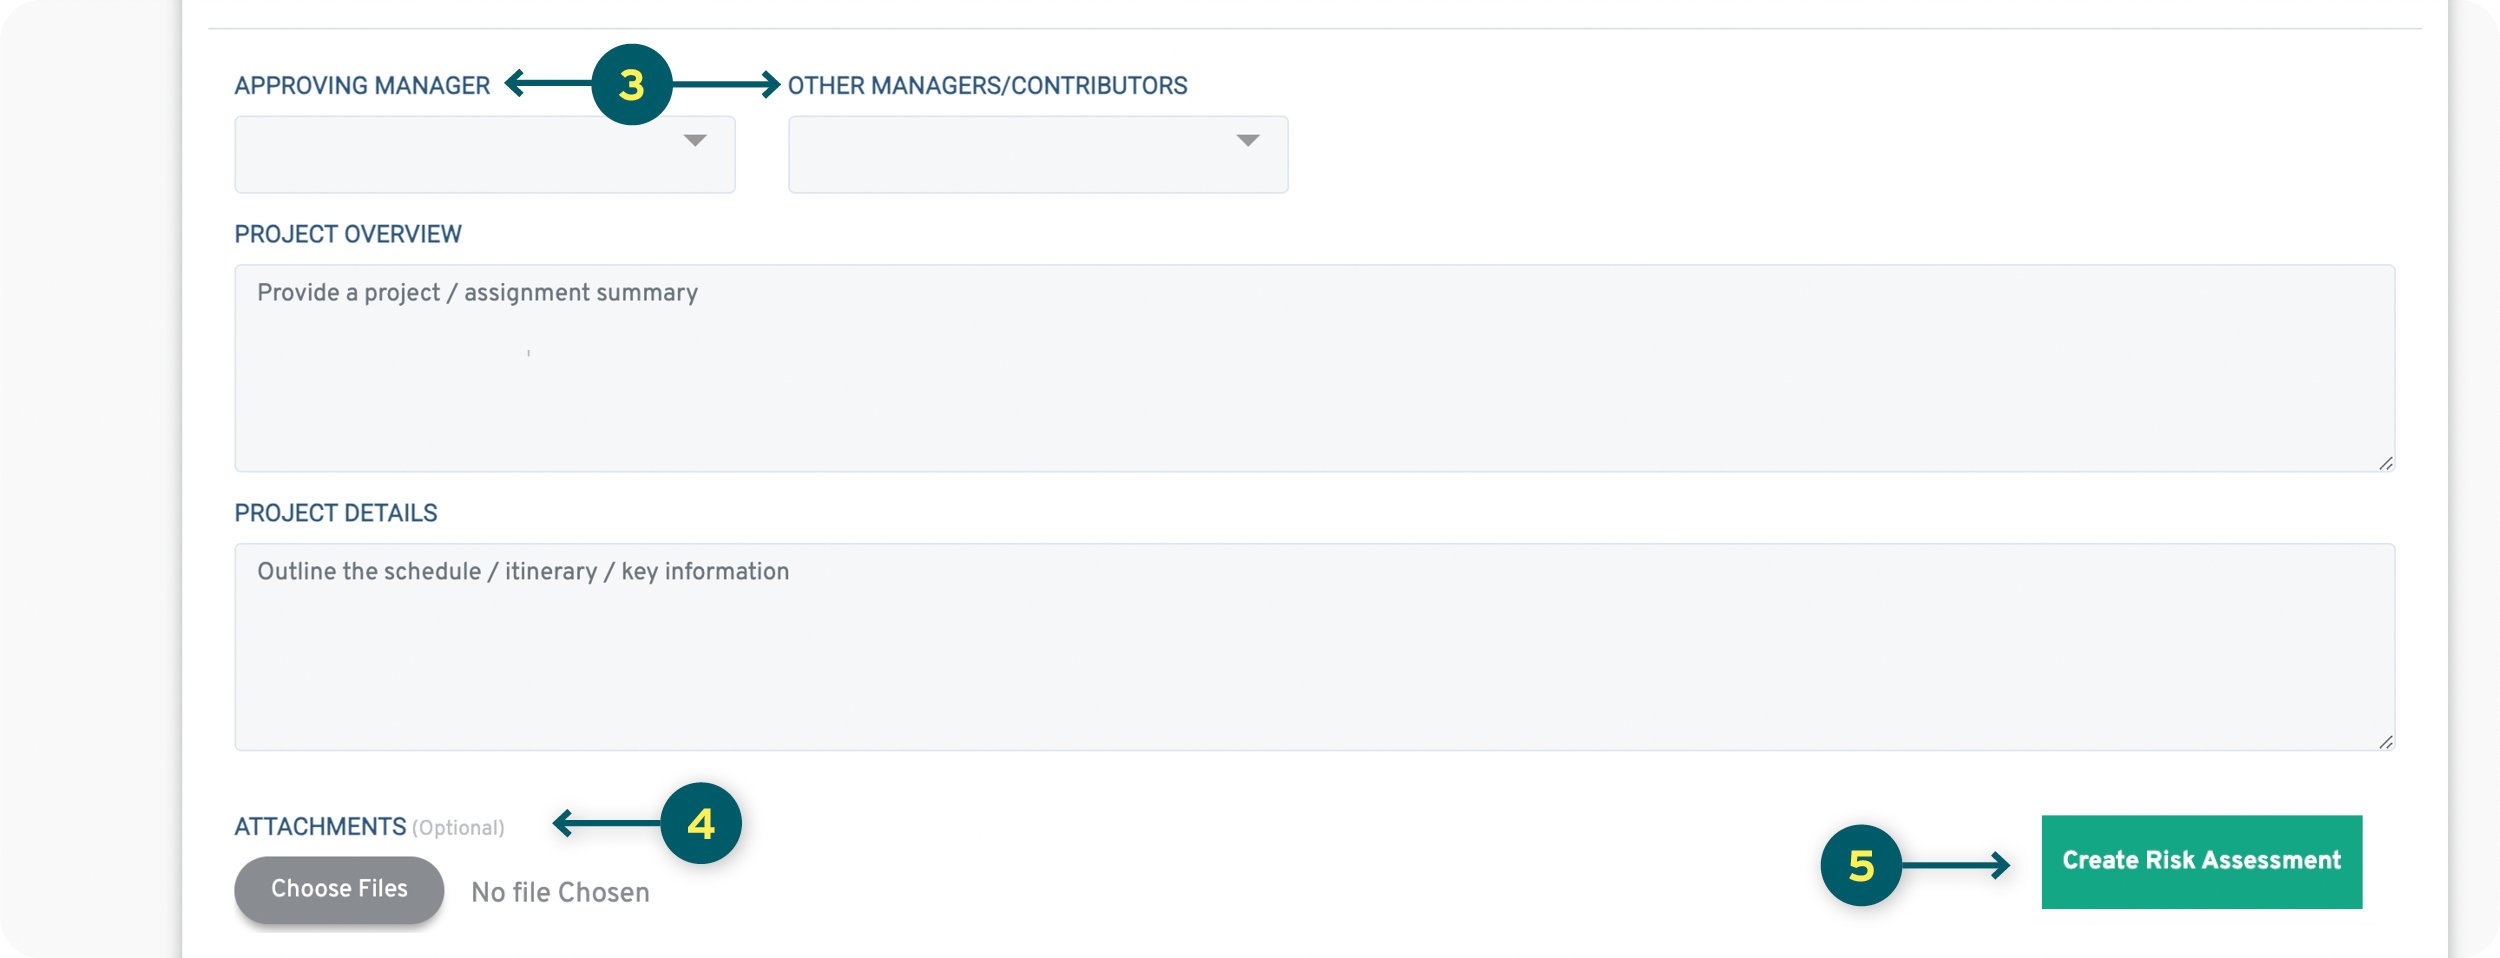
Note: Your Risk Assessment will not be saved until you click “Create Risk Assessment”
Country Profile
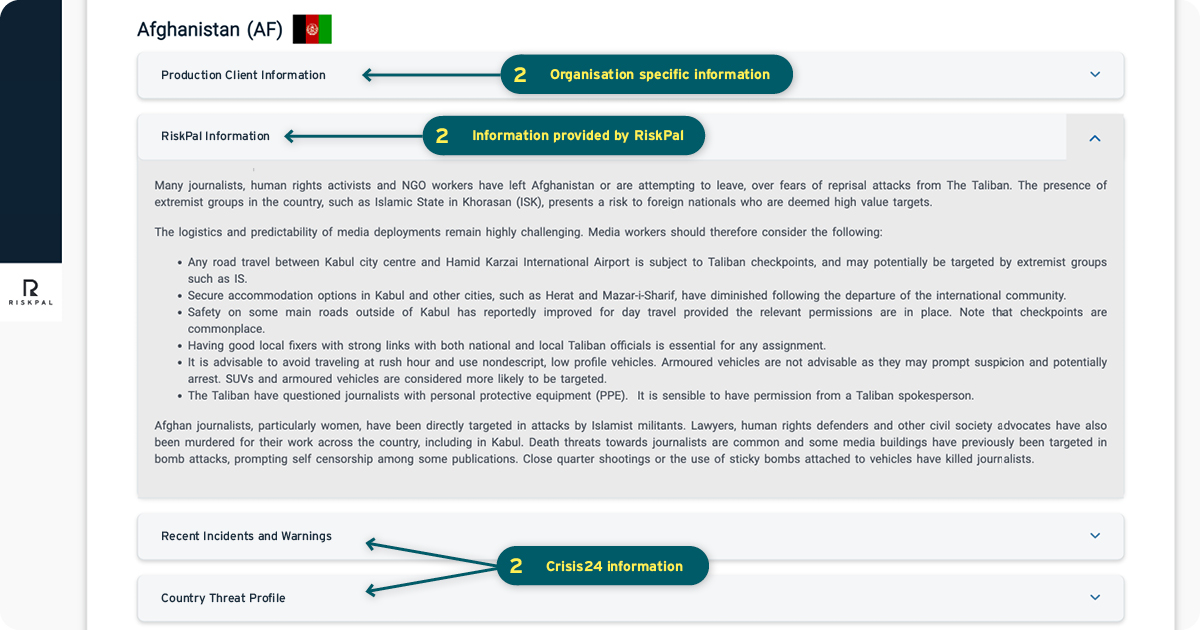
1. Your risk assessments may include a country profile and information on recent incidents provided by Crisis24. Some countries may also have additional information input by RiskPal.
2. The country threat profile can include your organisations’ own protocols or additional information for the destination. For more information on configuration of the country pages please refer to the Country Pages Customisation guide.

Risk & Mitigation
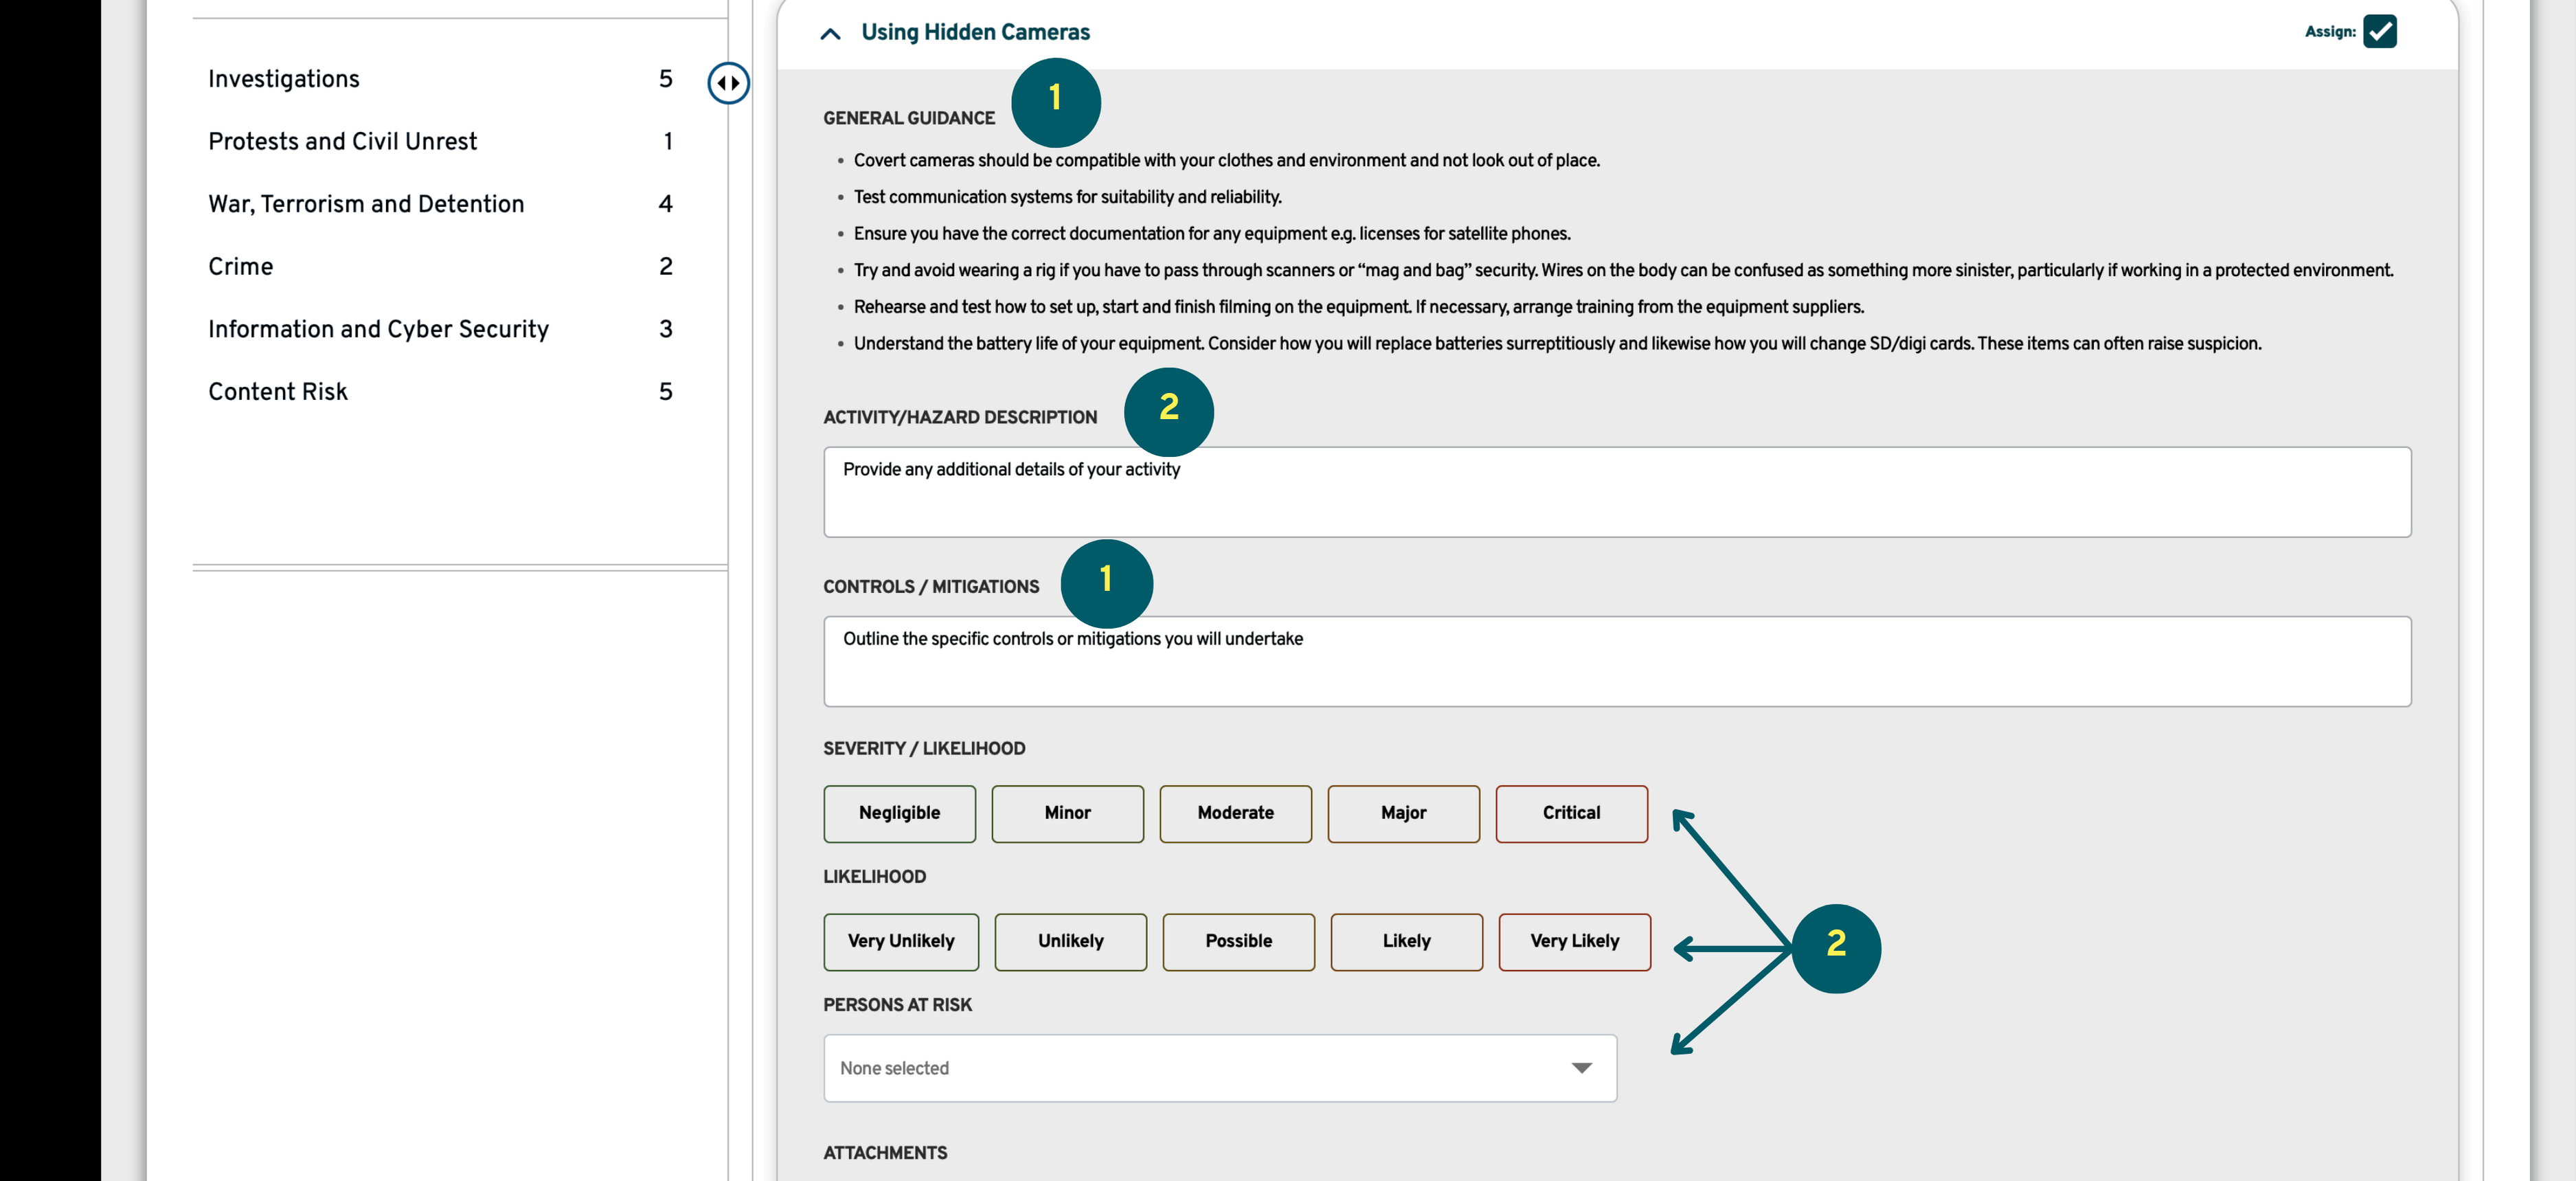
1. Here you can assign the activities or threats that are relevant by ticking the ‘Assign’ box. Read the general guidance and outline the specific controls and mitigation that you will undertake. Note that some terminology may vary depending on how the template has been set up.
2. Some risk assessments might require you to provide additional details to your activity and to choose a severity and likelihood score and identify persons at risk. A Residual risk score and/or a Risk Matrix might also be available. These are all optional features so you should fill them out according to your company policy.
3. If something is missing from the template, you can search the RiskPal library and assign it to your risk assessment.
4. In the library search you can filter by label or search for a specific keyword. You can also use the toggle if you want to see all existing content.



5. Using the drag and drop function, you can select the order in which your labels and questions appear.
6. If you want to see only the content you have selected, just use the “Show only assigned” toggle.

Supplier
1. You can select an existing supplier from the database by clicking on the Search Supplier List button or create and add a new supplier by clicking on the Add New Supplier button.

Communication
1. All Project Members selected in the Essential Info will be auto populated in the Project Members section. You can add any others here.
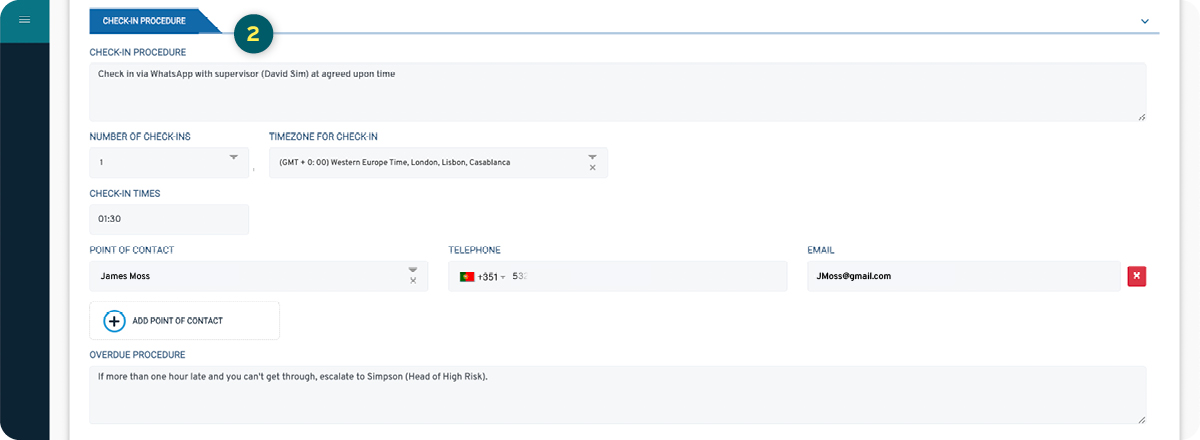
2. If applicable, include a check-in schedule and an overdue procedure.
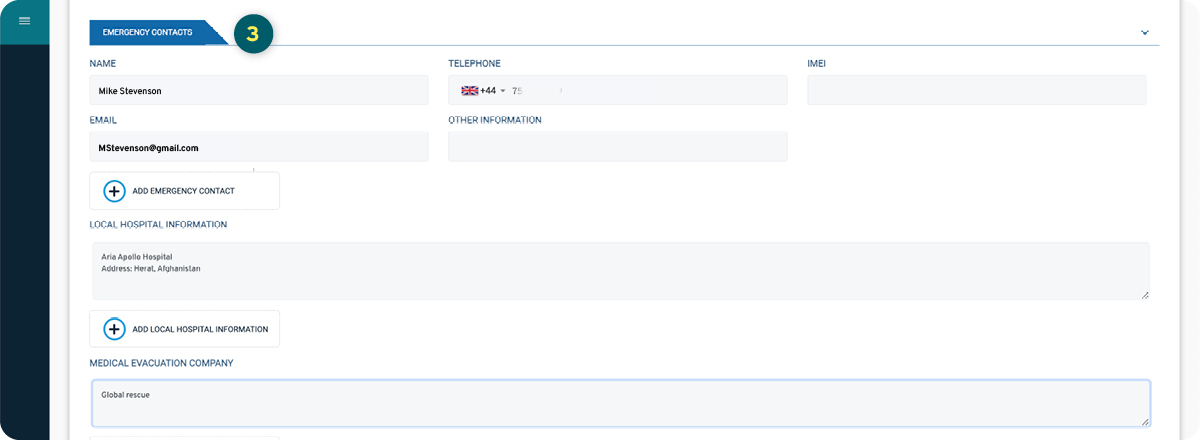
3. The Emergency Contact section allows you to add information about local emergency contacts as well as local hospital information and contact details for the medical evacuation company.
4. You can outline items you will be taking in the Equipment Section. If an item is pre-selected in the template, this indicates it is recommended for the assignment.


Other Details
1. On the Other Details page you can give the project an overall Project Risk score (this is an optional feature and not shown in the image below) and add any Additional Information that is relevant for the risk assessment.
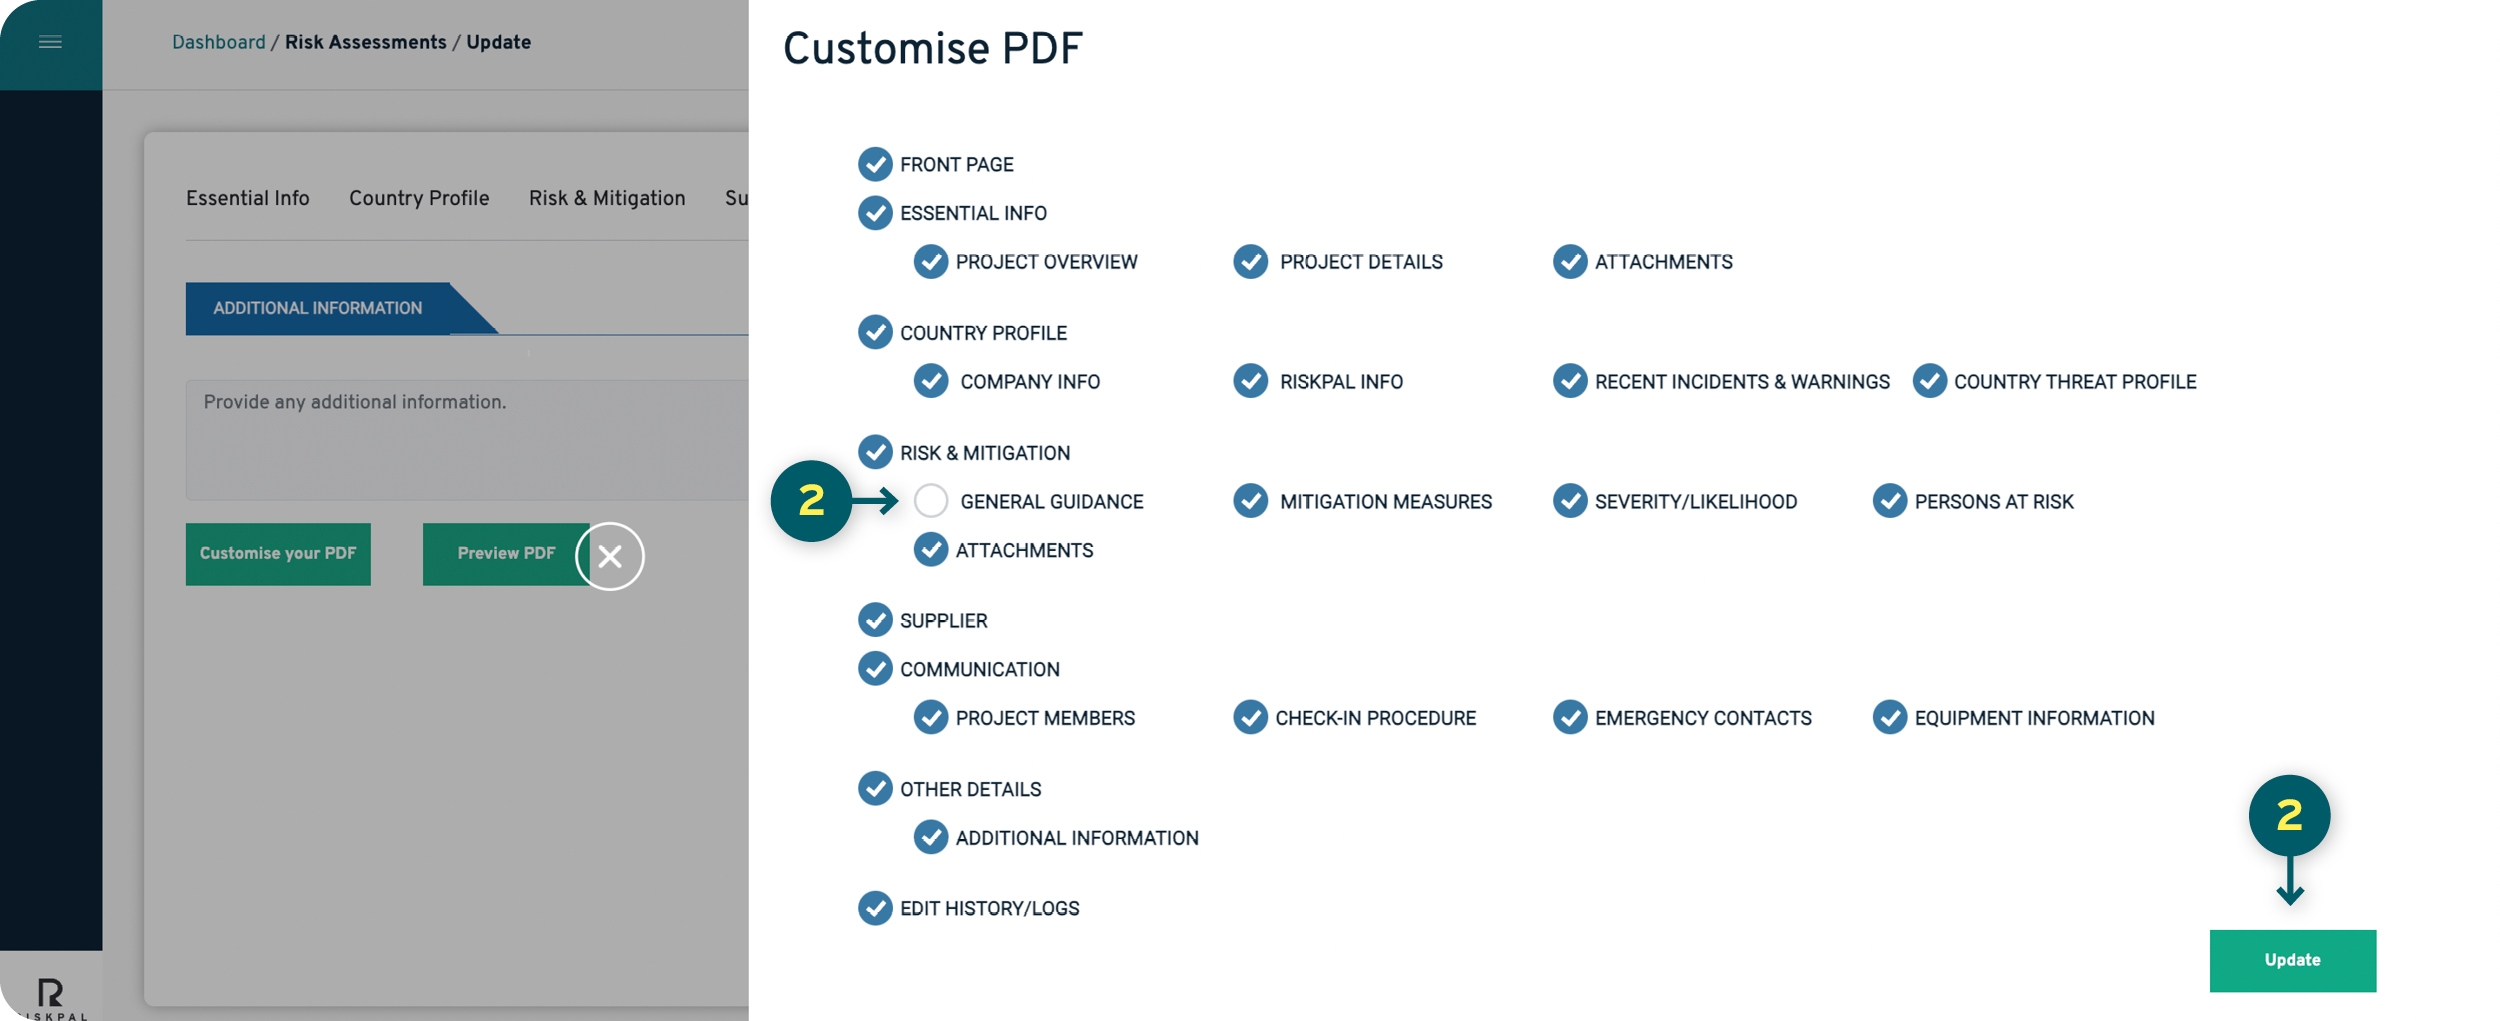
At the bottom of the page, you can Customise or Preview the PDF version of your risk assessment. When you click the Preview PDF button, a PDF version of your risk assessment will be either downloaded to your computer or opened in a separate browser window.
2. The Customise PDF button opens a menu that allows you to select which sections to include in the final PDF version. Choices made here will not affect what Approving Managers, Project Members and other contributors can see when accessing the risk assessment via RiskPal.

Submitting Your Risk Assessment
1. When you submit the risk assessment you can manage who is notified, add a personal message and can choose whether you want to attach the risk assessment, as a PDF, to the email or not.
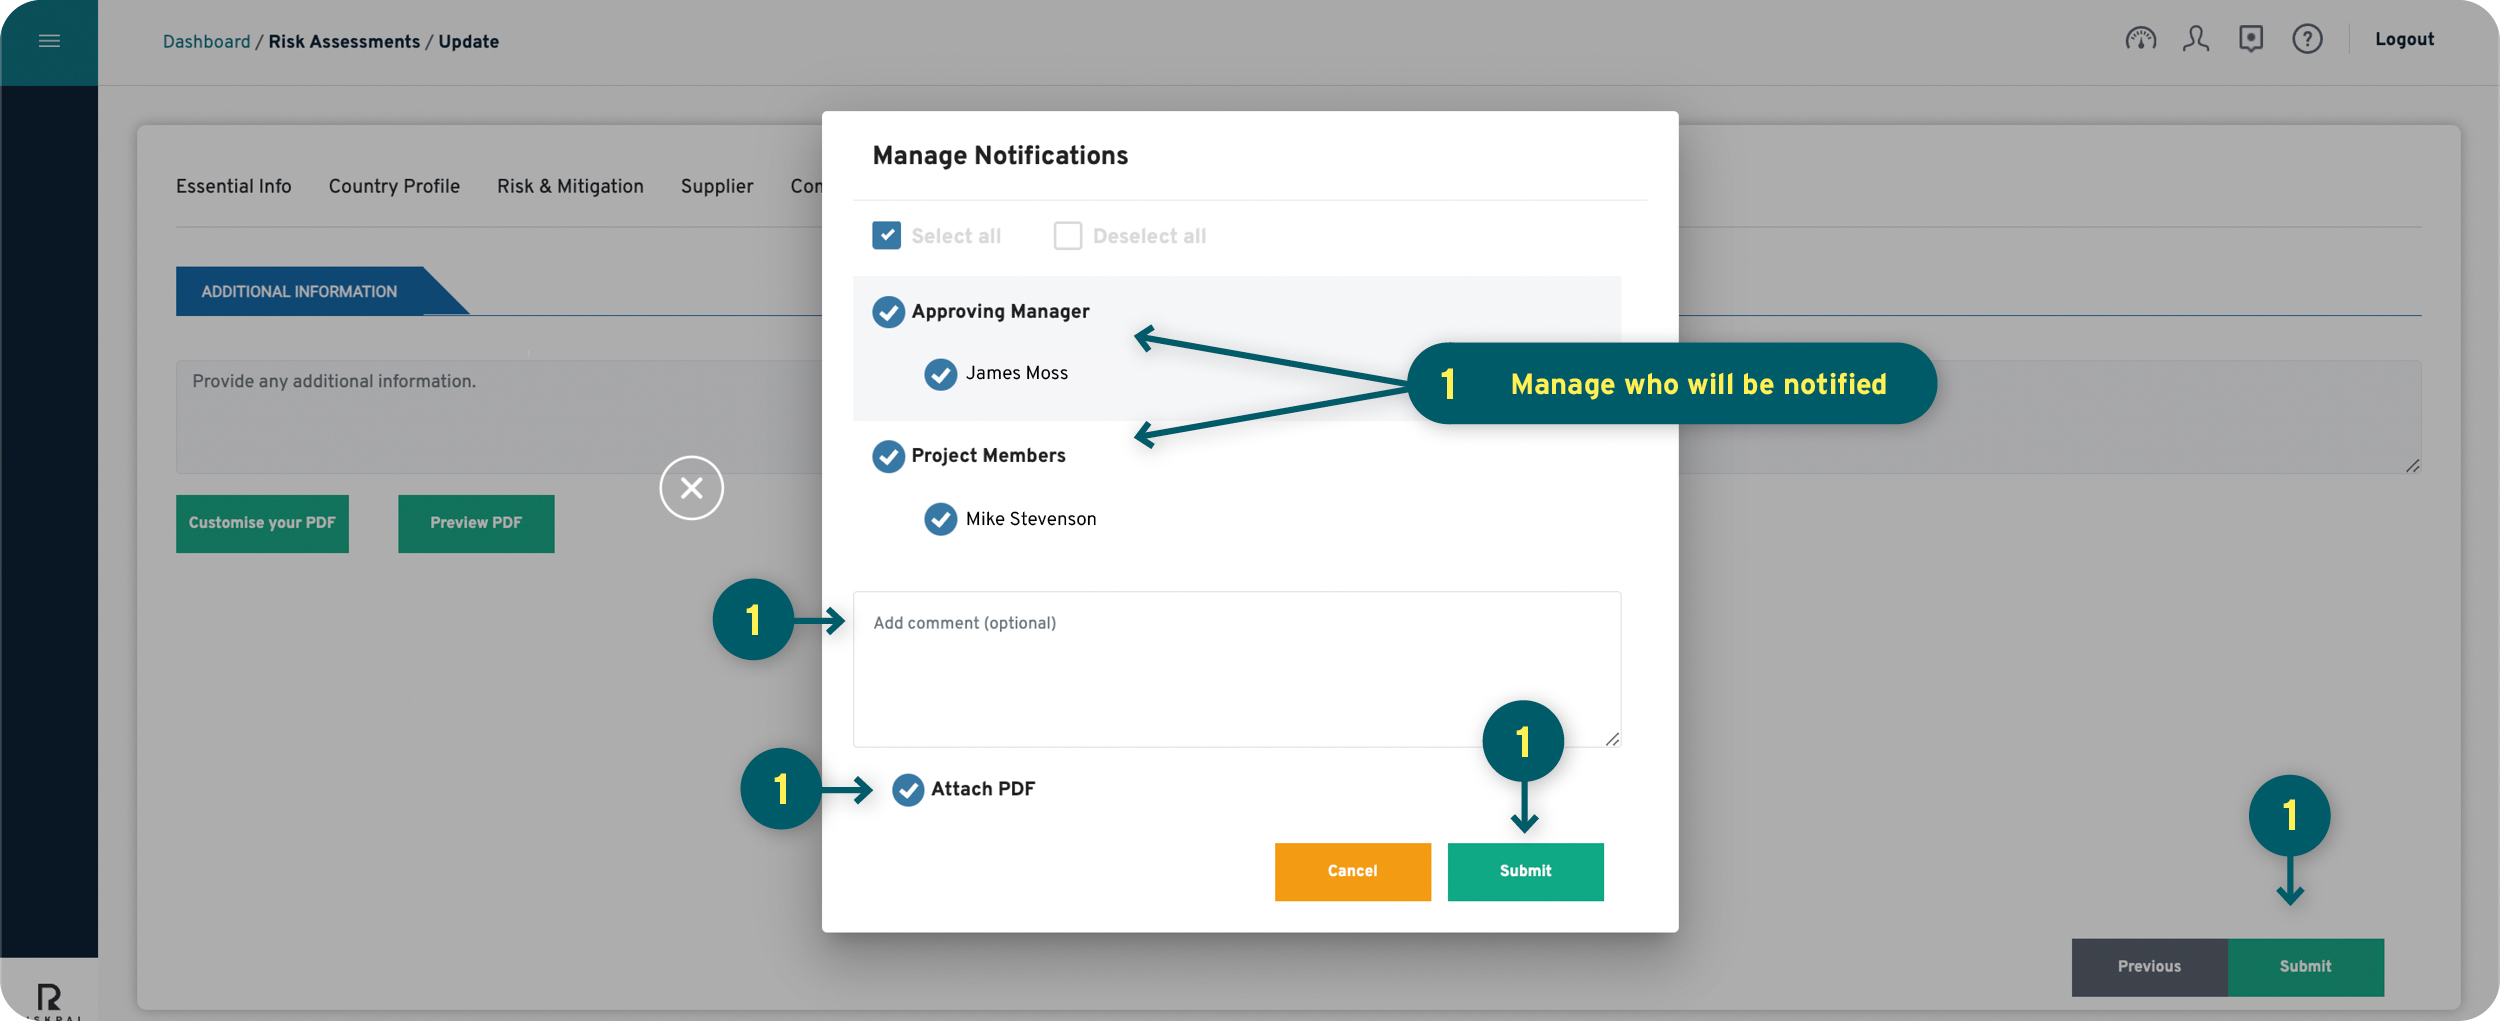
Your selected preferences will then carry through to all other steps of the Risk Assessment cycle.
Note: If this notification pop-up or the option to attach a PDF do not appear, this is because they have been deactivated in the template settings.
Copying a Previous Risk Assessment
1. You can copy a previous risk assessment from your Risk Assessment List or the Risk Register (if you have the appropriate permissions), which you can access via your dashboard.
2. When copying a risk assessment, all information but project name and dates will be carried over from the old risk assessment. You will be prompted to ensure that all information is up to date.
3. If the risk assessment template has changed since the last time you used it, RiskPal will notify you of this change and ask you how you want to proceed. If you want to use the new template, you will have to create a new risk assessment choosing the new template instead of copying and updating the information of the old one.


