Template Creation
Getting Started
Creating risk assessment templates allows you to standardise information and advice for common activities, projects and locations.
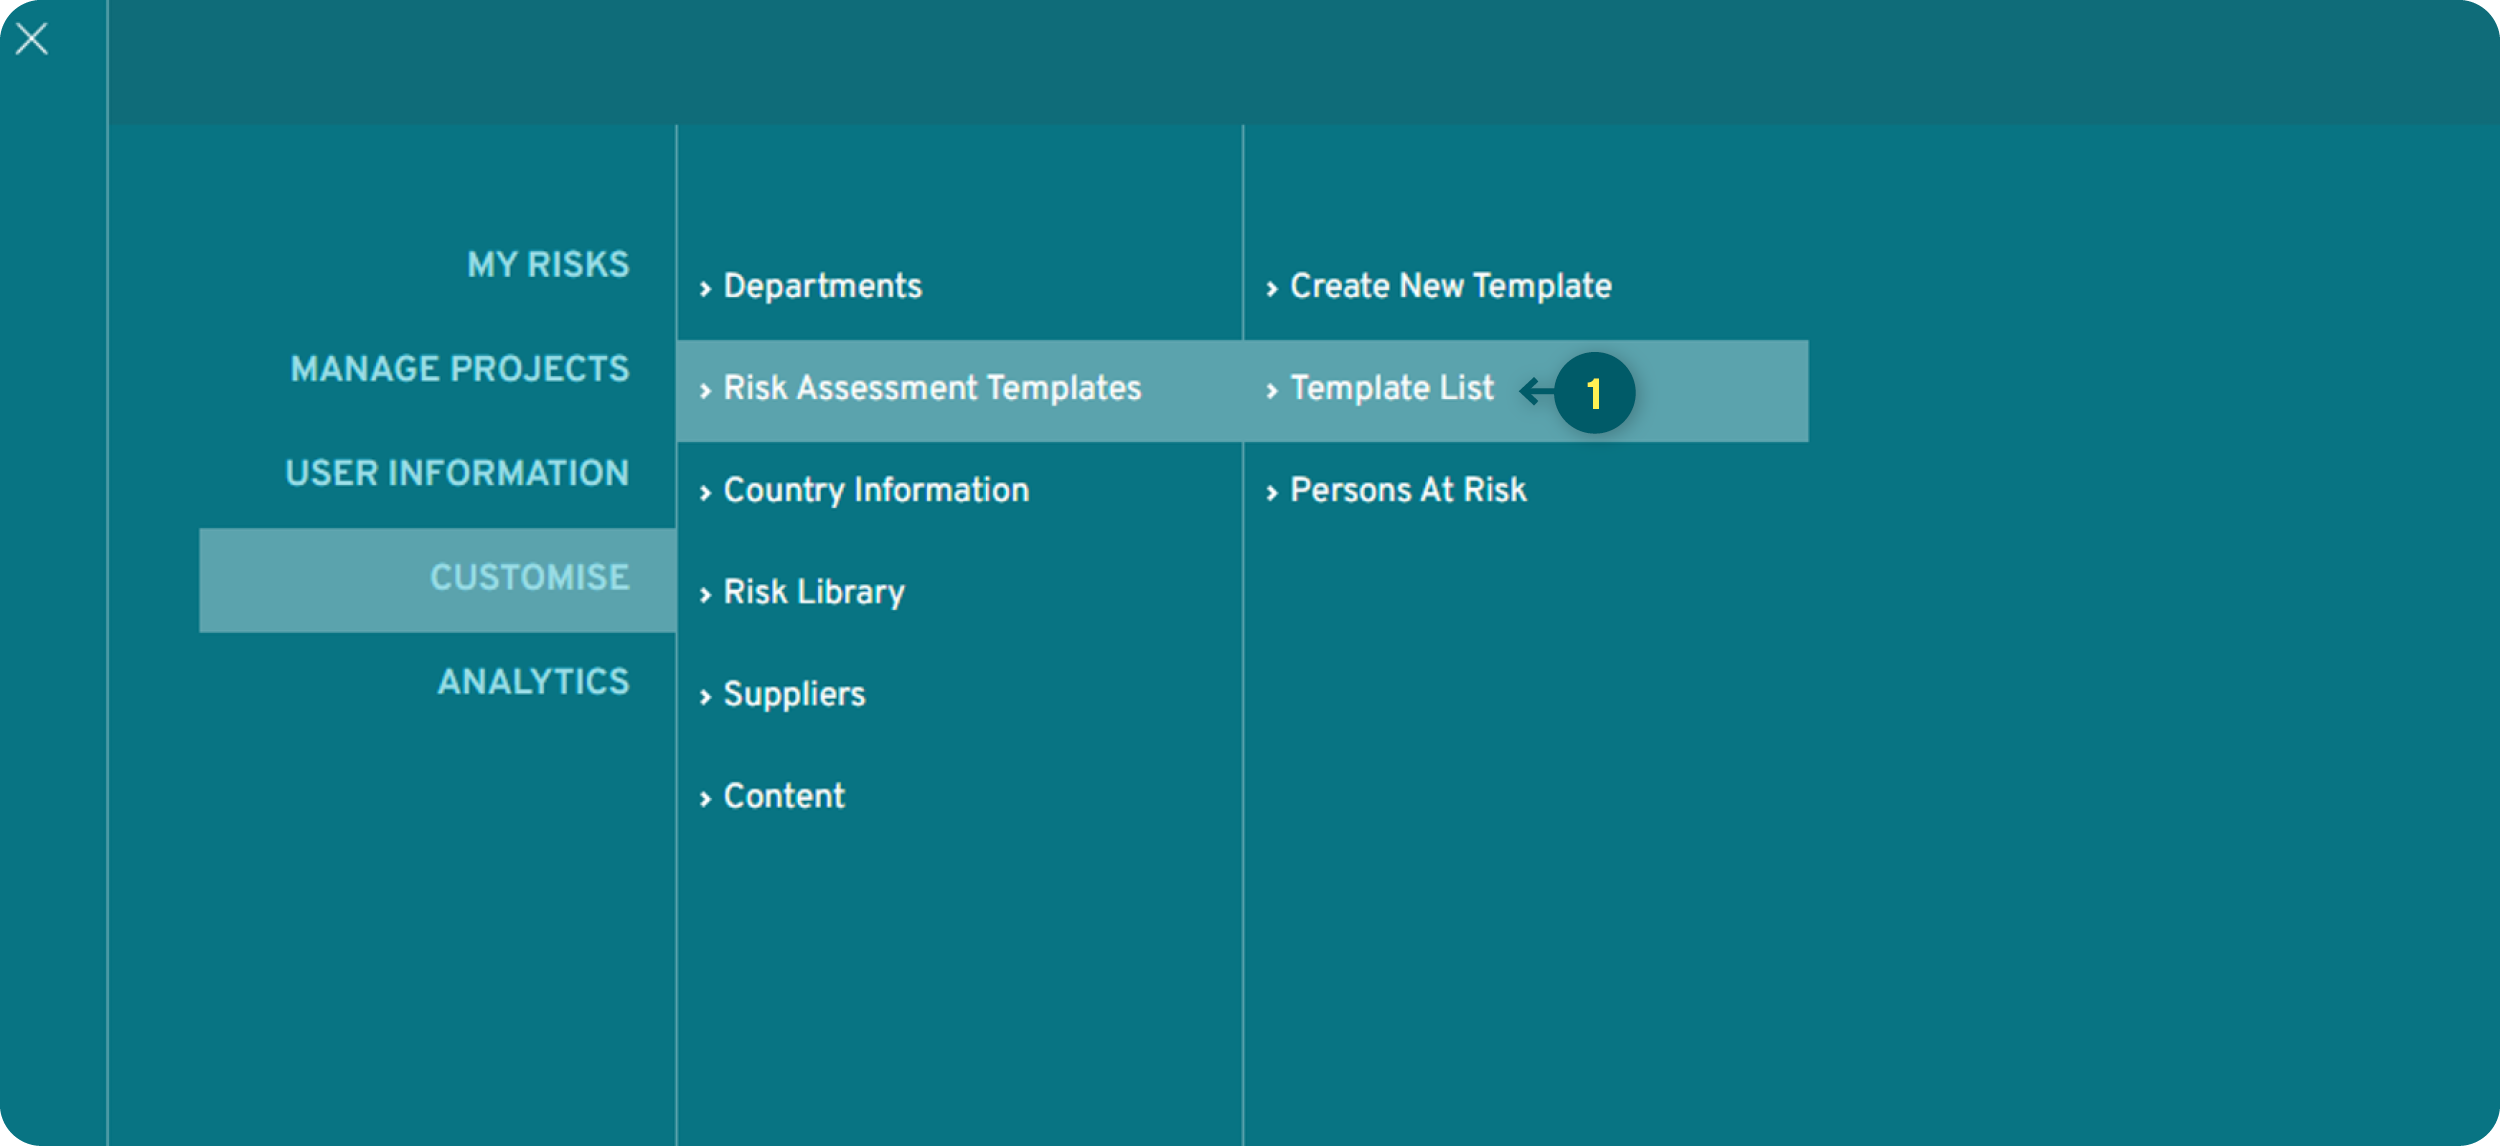
1. Go to the Customise/Risk Assessment Templates menu and choose if you want to create a new template or edit one from your current list.
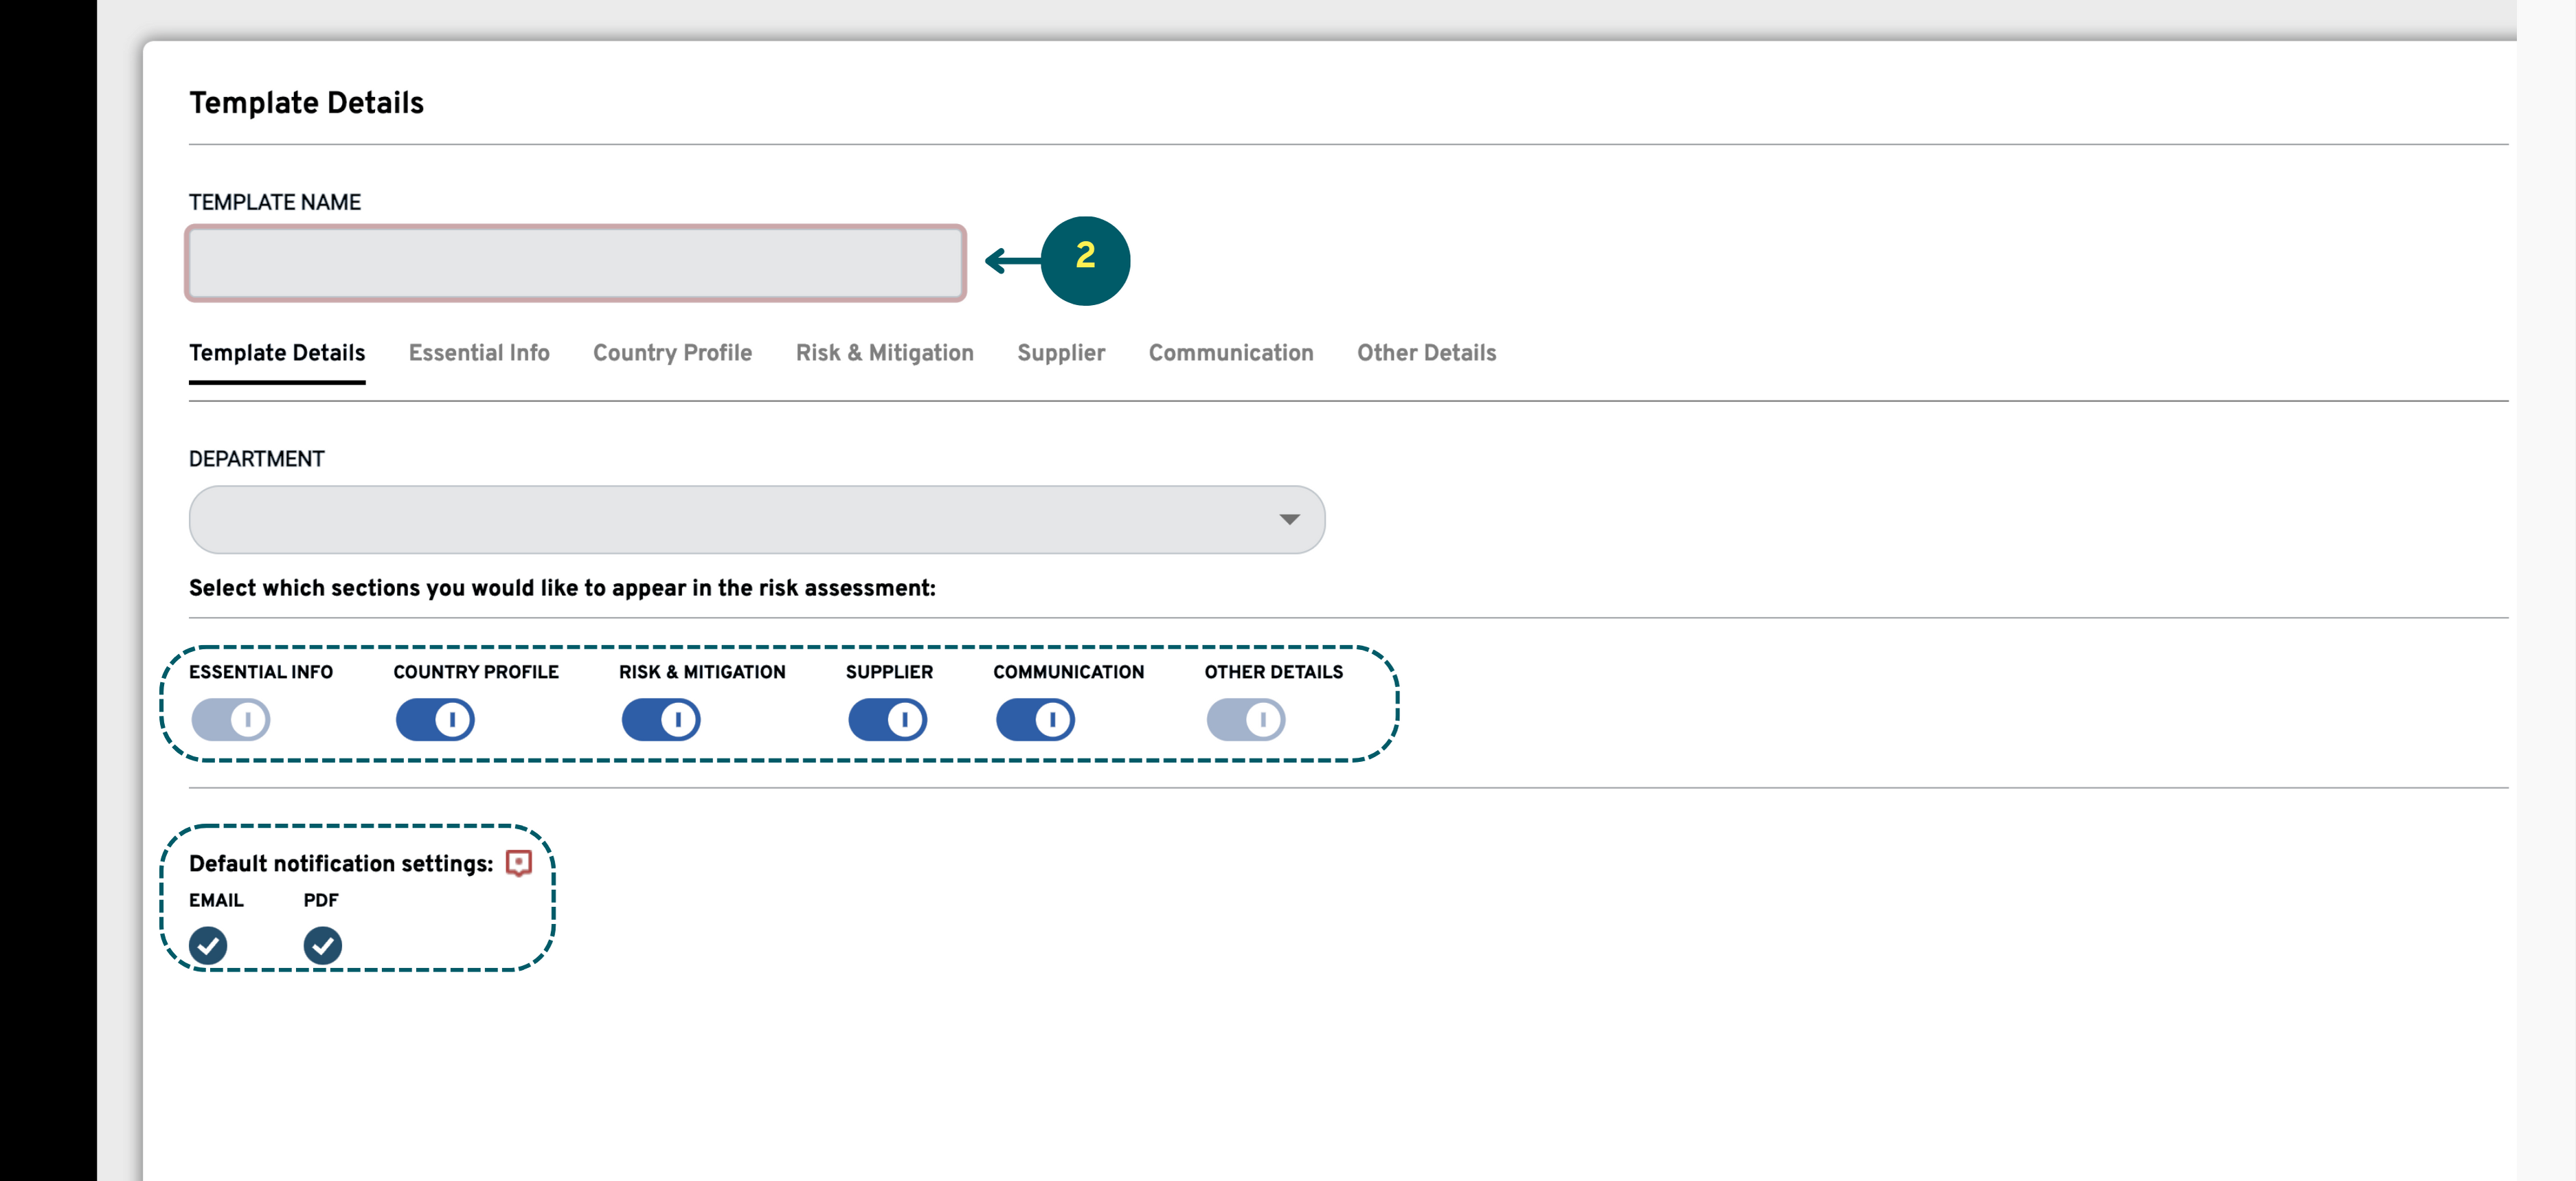
2. First, name your template and assign it to the relevant department/s. Departments not selected here will not have access to this template.
Select the sections you want to include in the risk assessment. Essential Info and Other Details are mandatory sections and cannot be entirely removed. You can select the other sections depending on the information you want the template to contain.
You can also select if you want email and PDF notifications enabled for this specific template. If selected, these can still be deactivated by users for individual risk assessments.
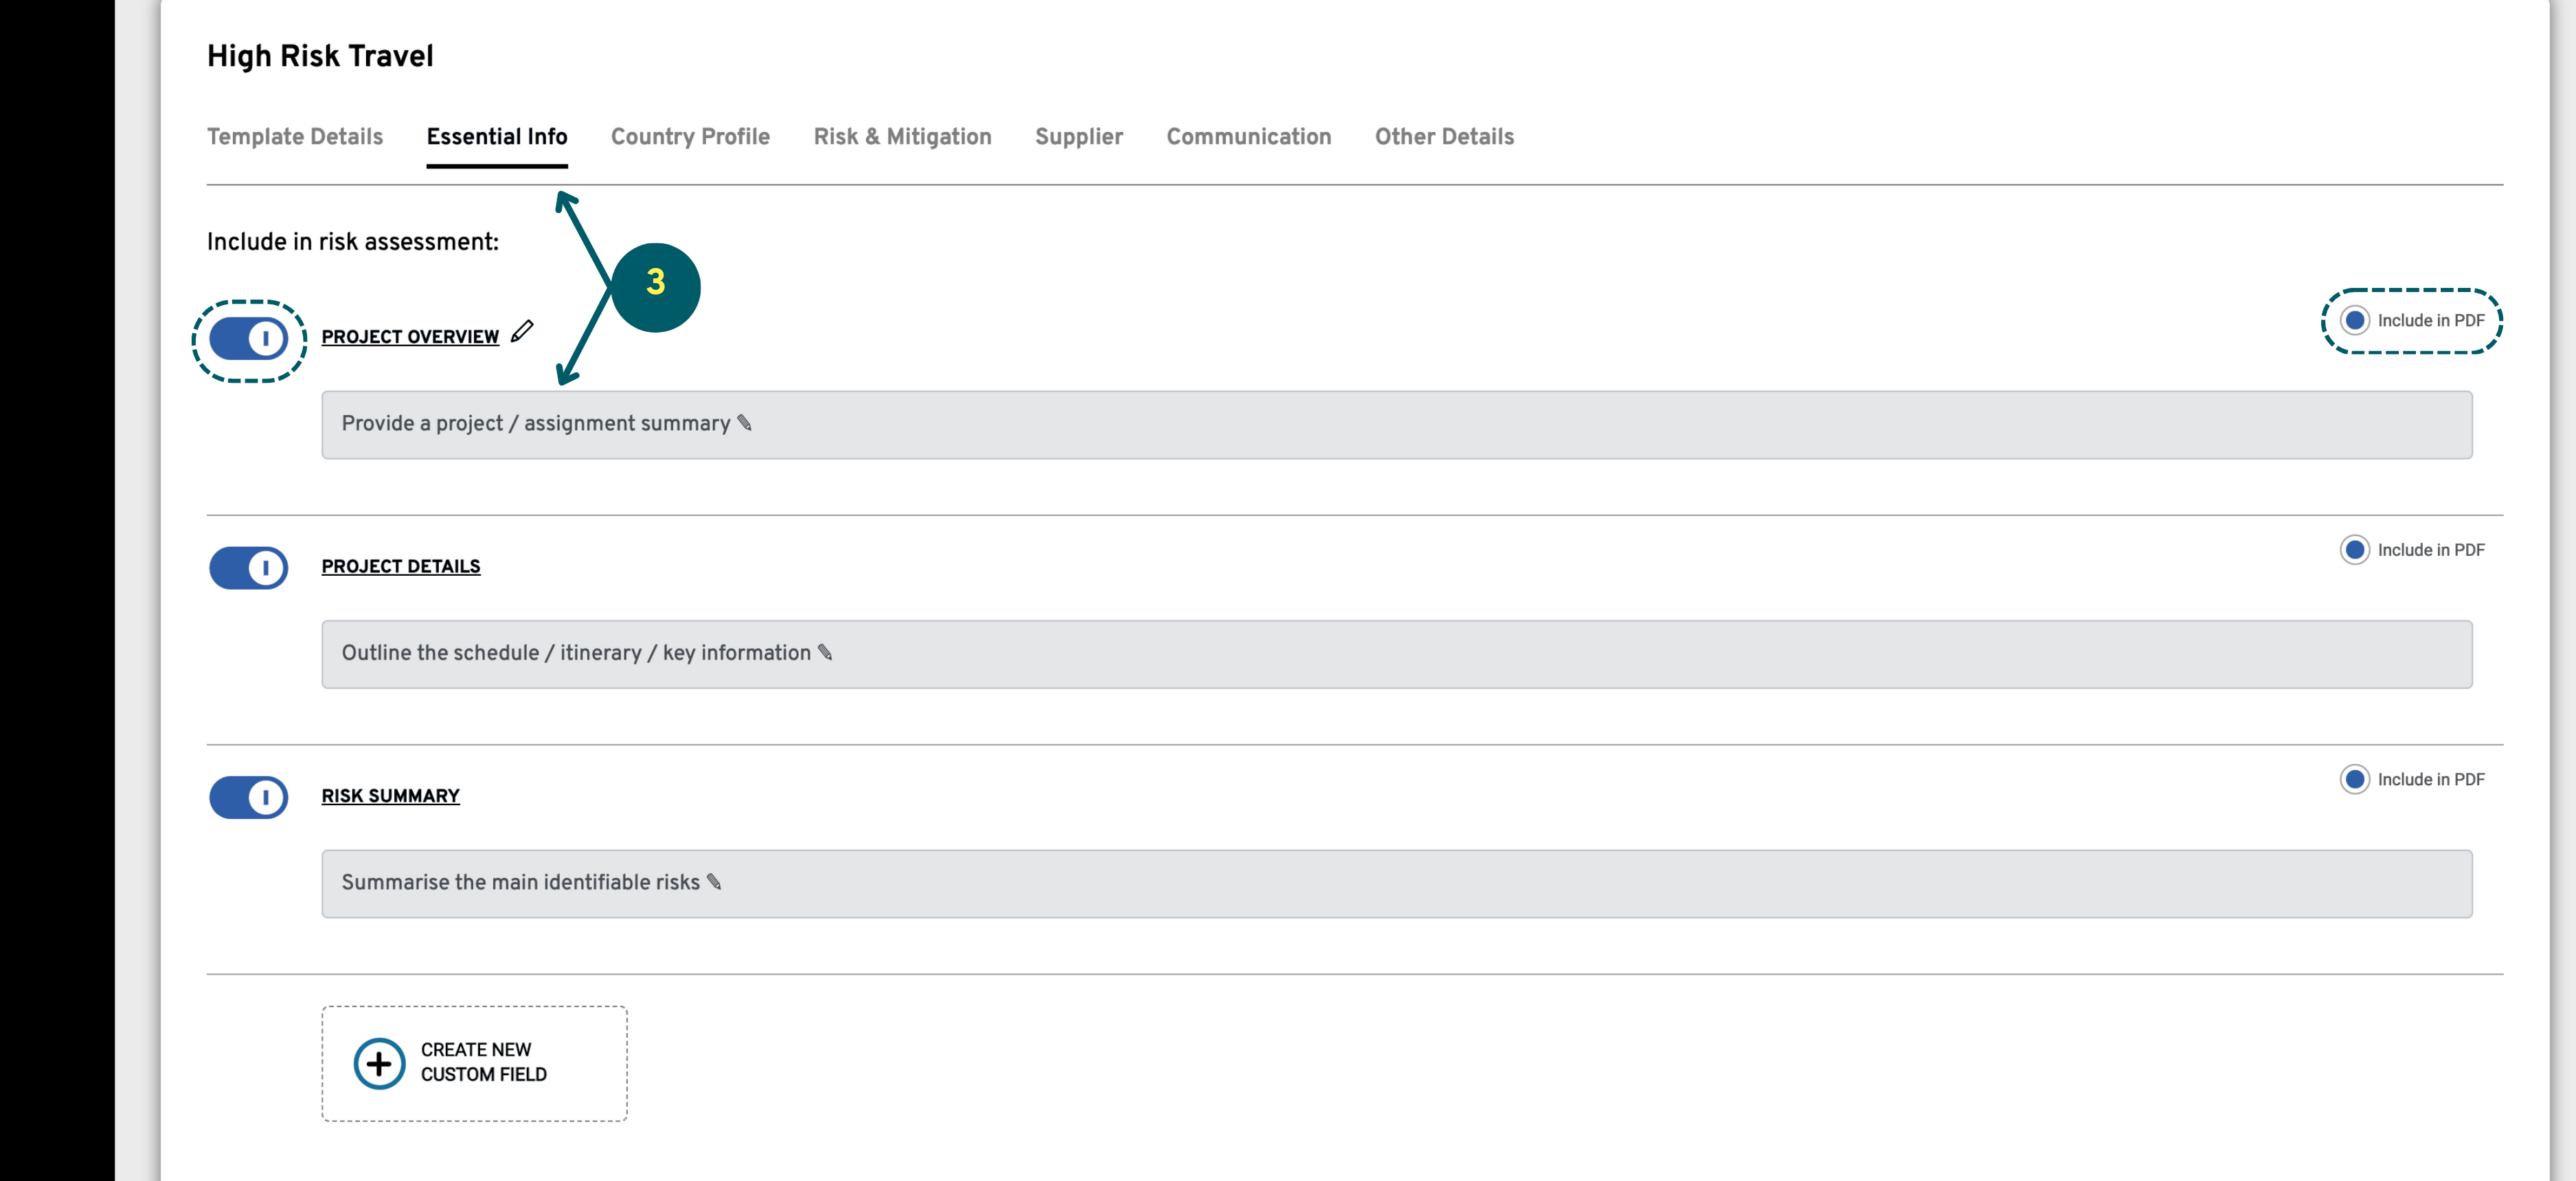
3. In the Essential Info section, you can decide which fields to include, edit field names, add additional fields and configure the default PDF settings. You can also customise the instructional text, which users will see when completing the risk assessment.
4. In Country Profile, you can determine what information you would like to appear when the User is filling out a risk assessment and, also, if you would like to make it available in the PDF, by default. Detailed information on Country Profiles, please refer to the relevant guide.

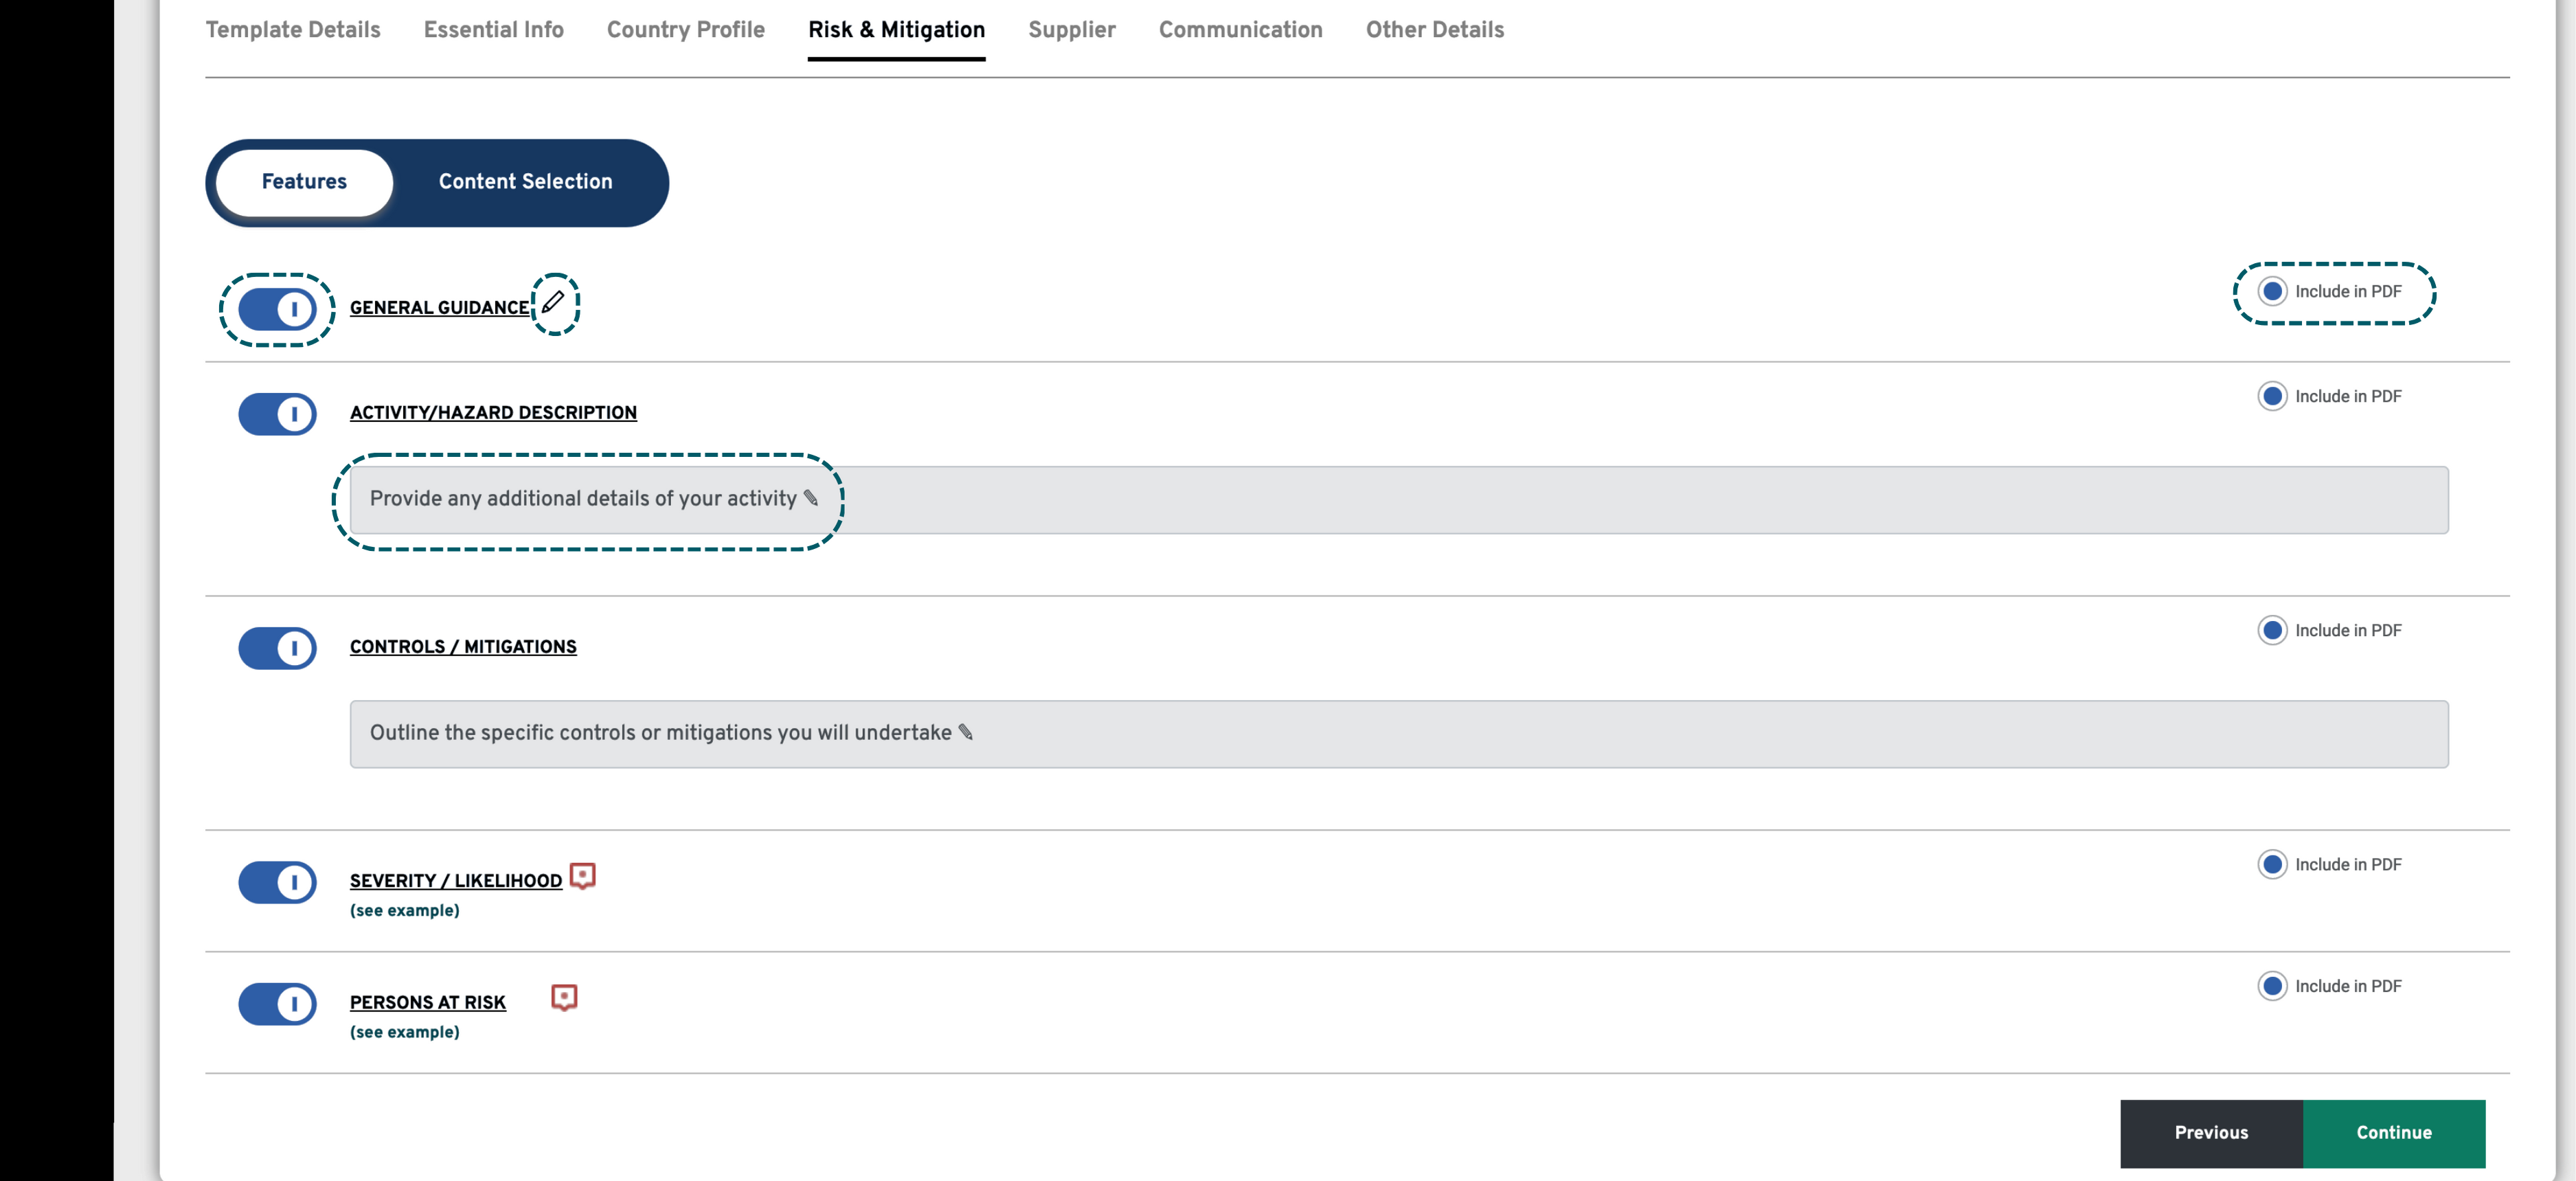
5. The Risk & Mitigation section consists of two parts: Features and Content Selection.
Features: Similar to the Essential Info section, you can configure which sections to include, section names, the information required from users and which sections to include in the PDF.
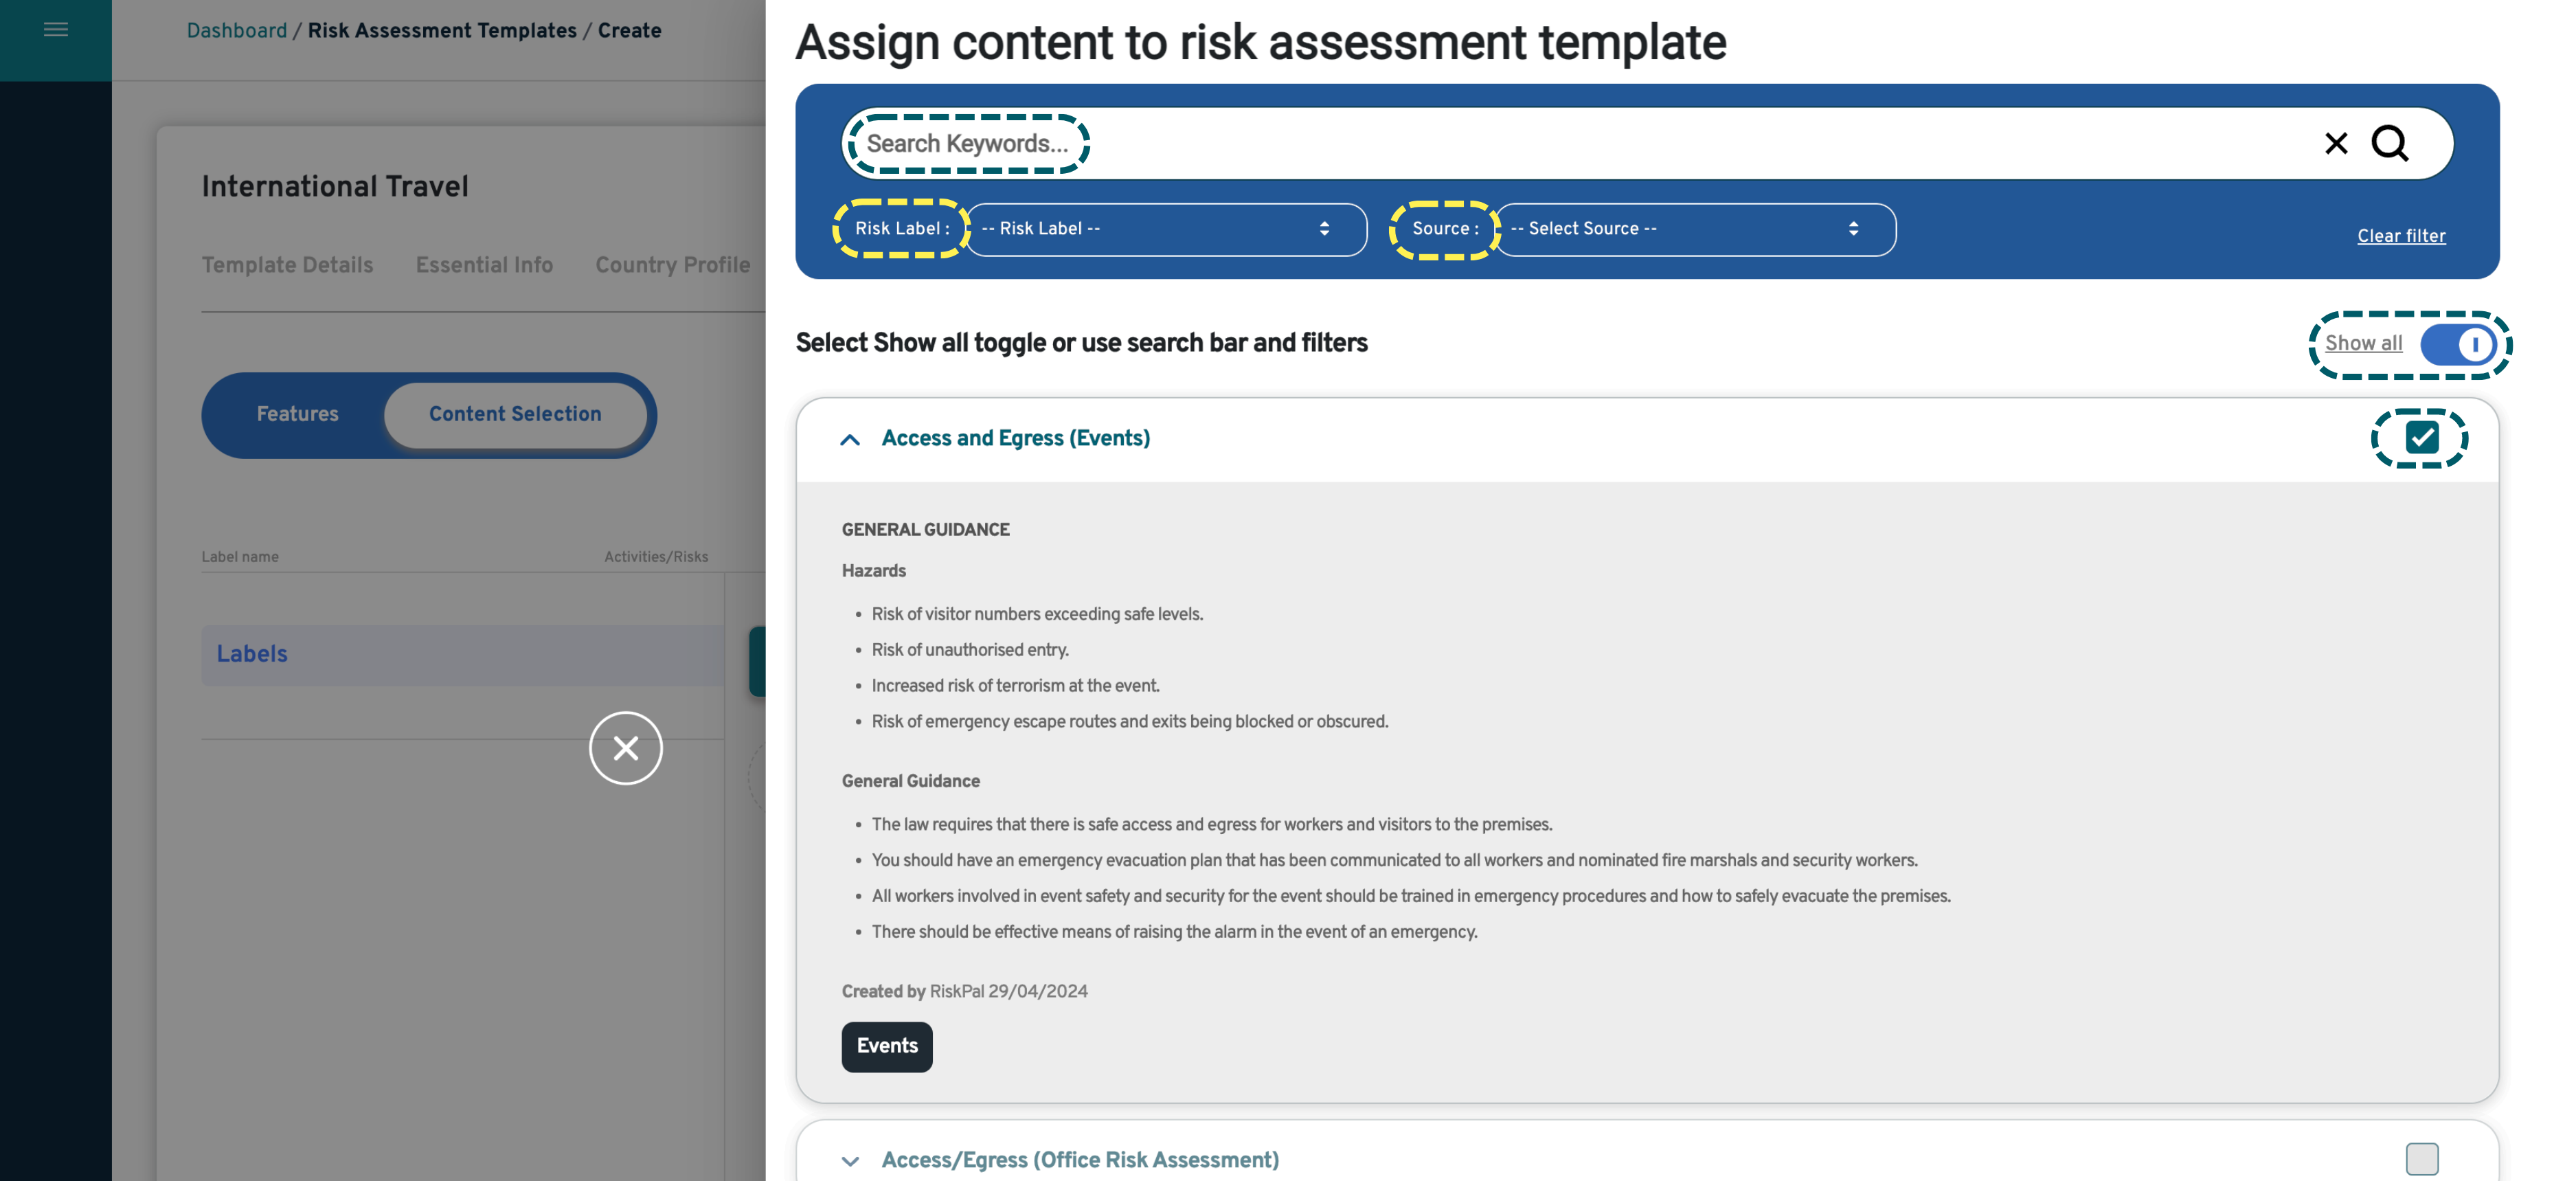
Content Selection: To assign the relevant content, just navigate the library and select the information to include. You can search the risk library by keyword, risk label or source, view the accompanying guidance and select what to include.

Use the drag and drop function to reorder your template once you have selected every activity you want to include. This will determine the order of content that users will see when completing the risk assessment.


For more information on the Risk & Mitigation section in the risk assessment, please refer to the relevant guide.
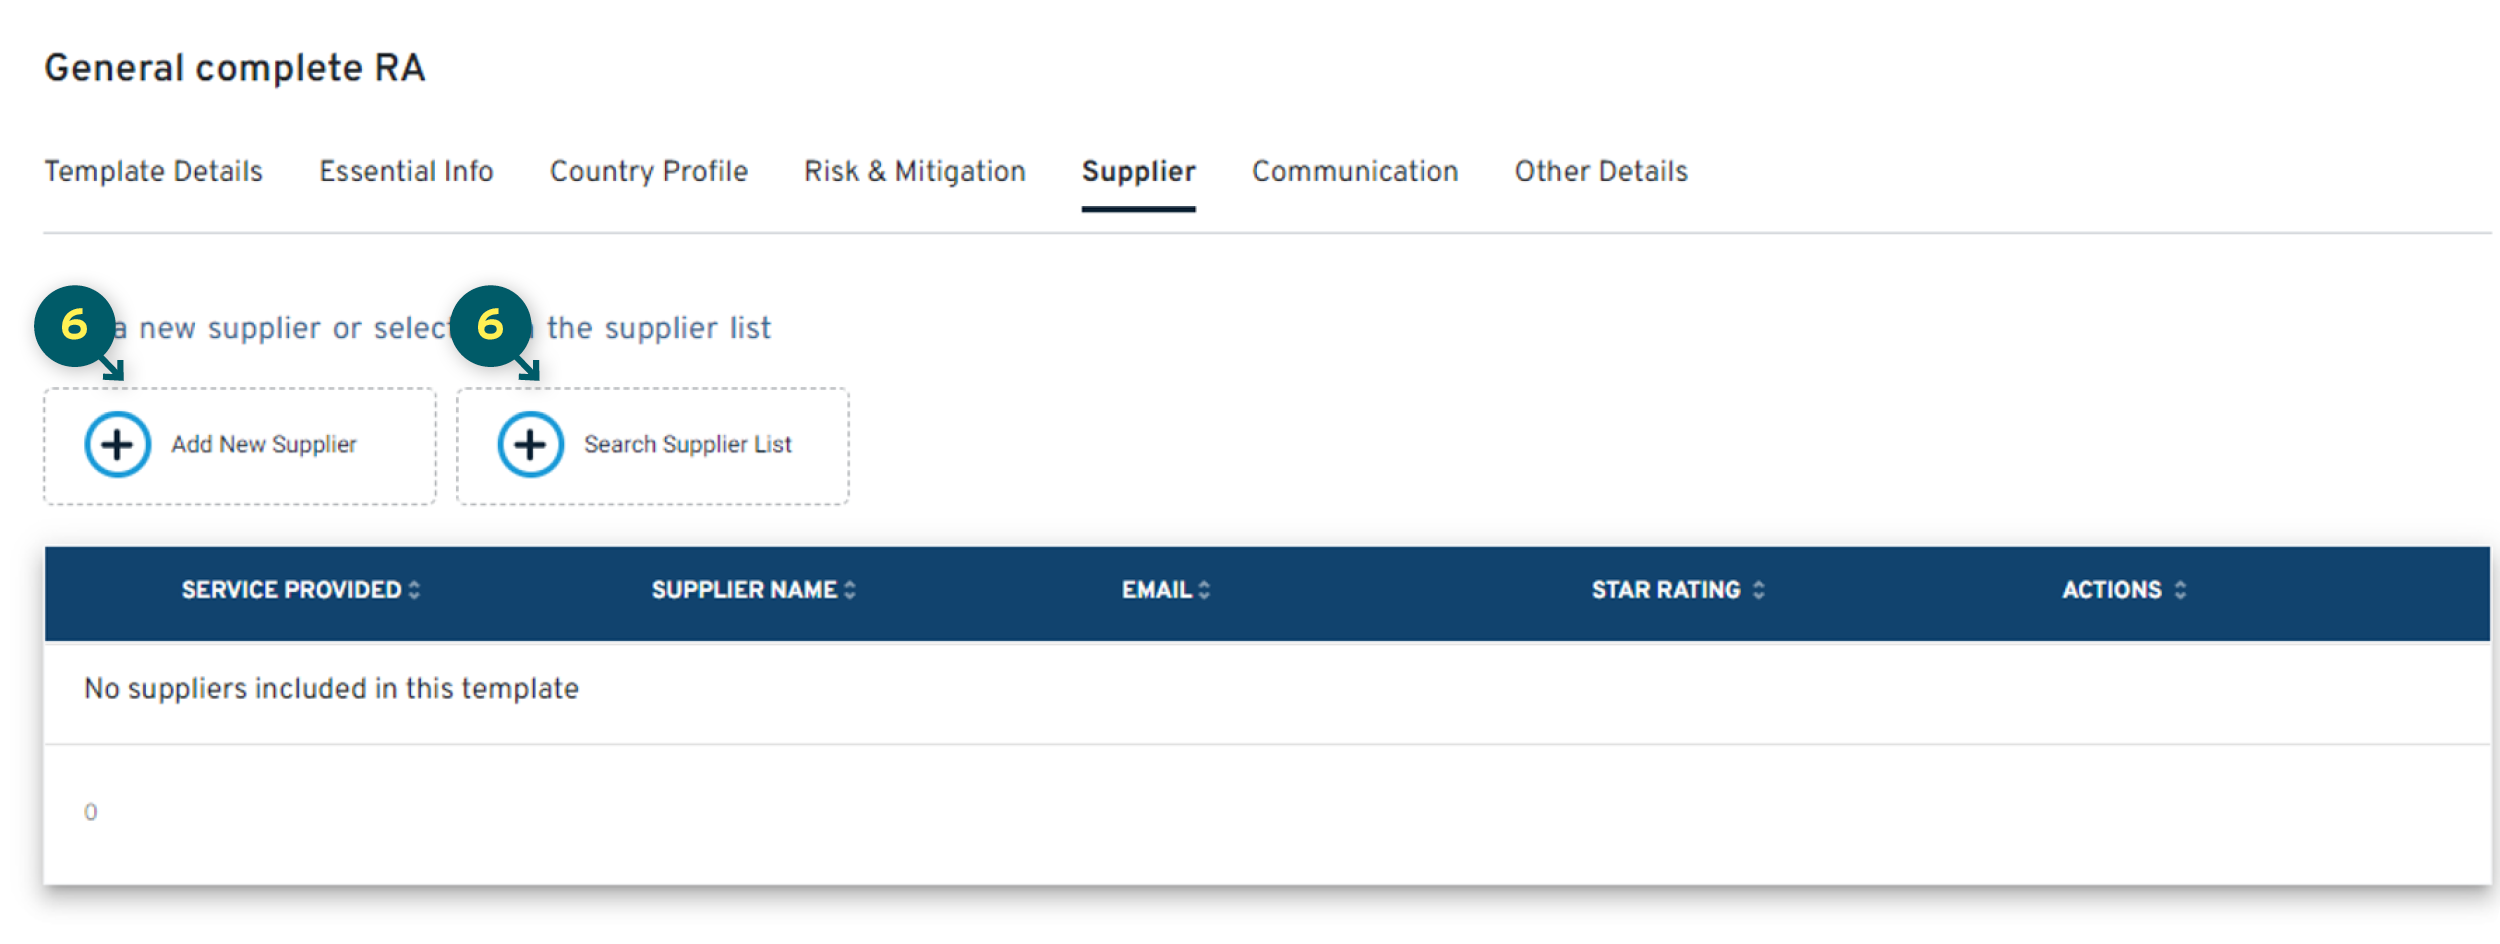
6. The Supplier section allows you to recommend service providers in that template. This could be a pre-vetted driver, preferred accommodation or other service providers that have been recommended by staff.
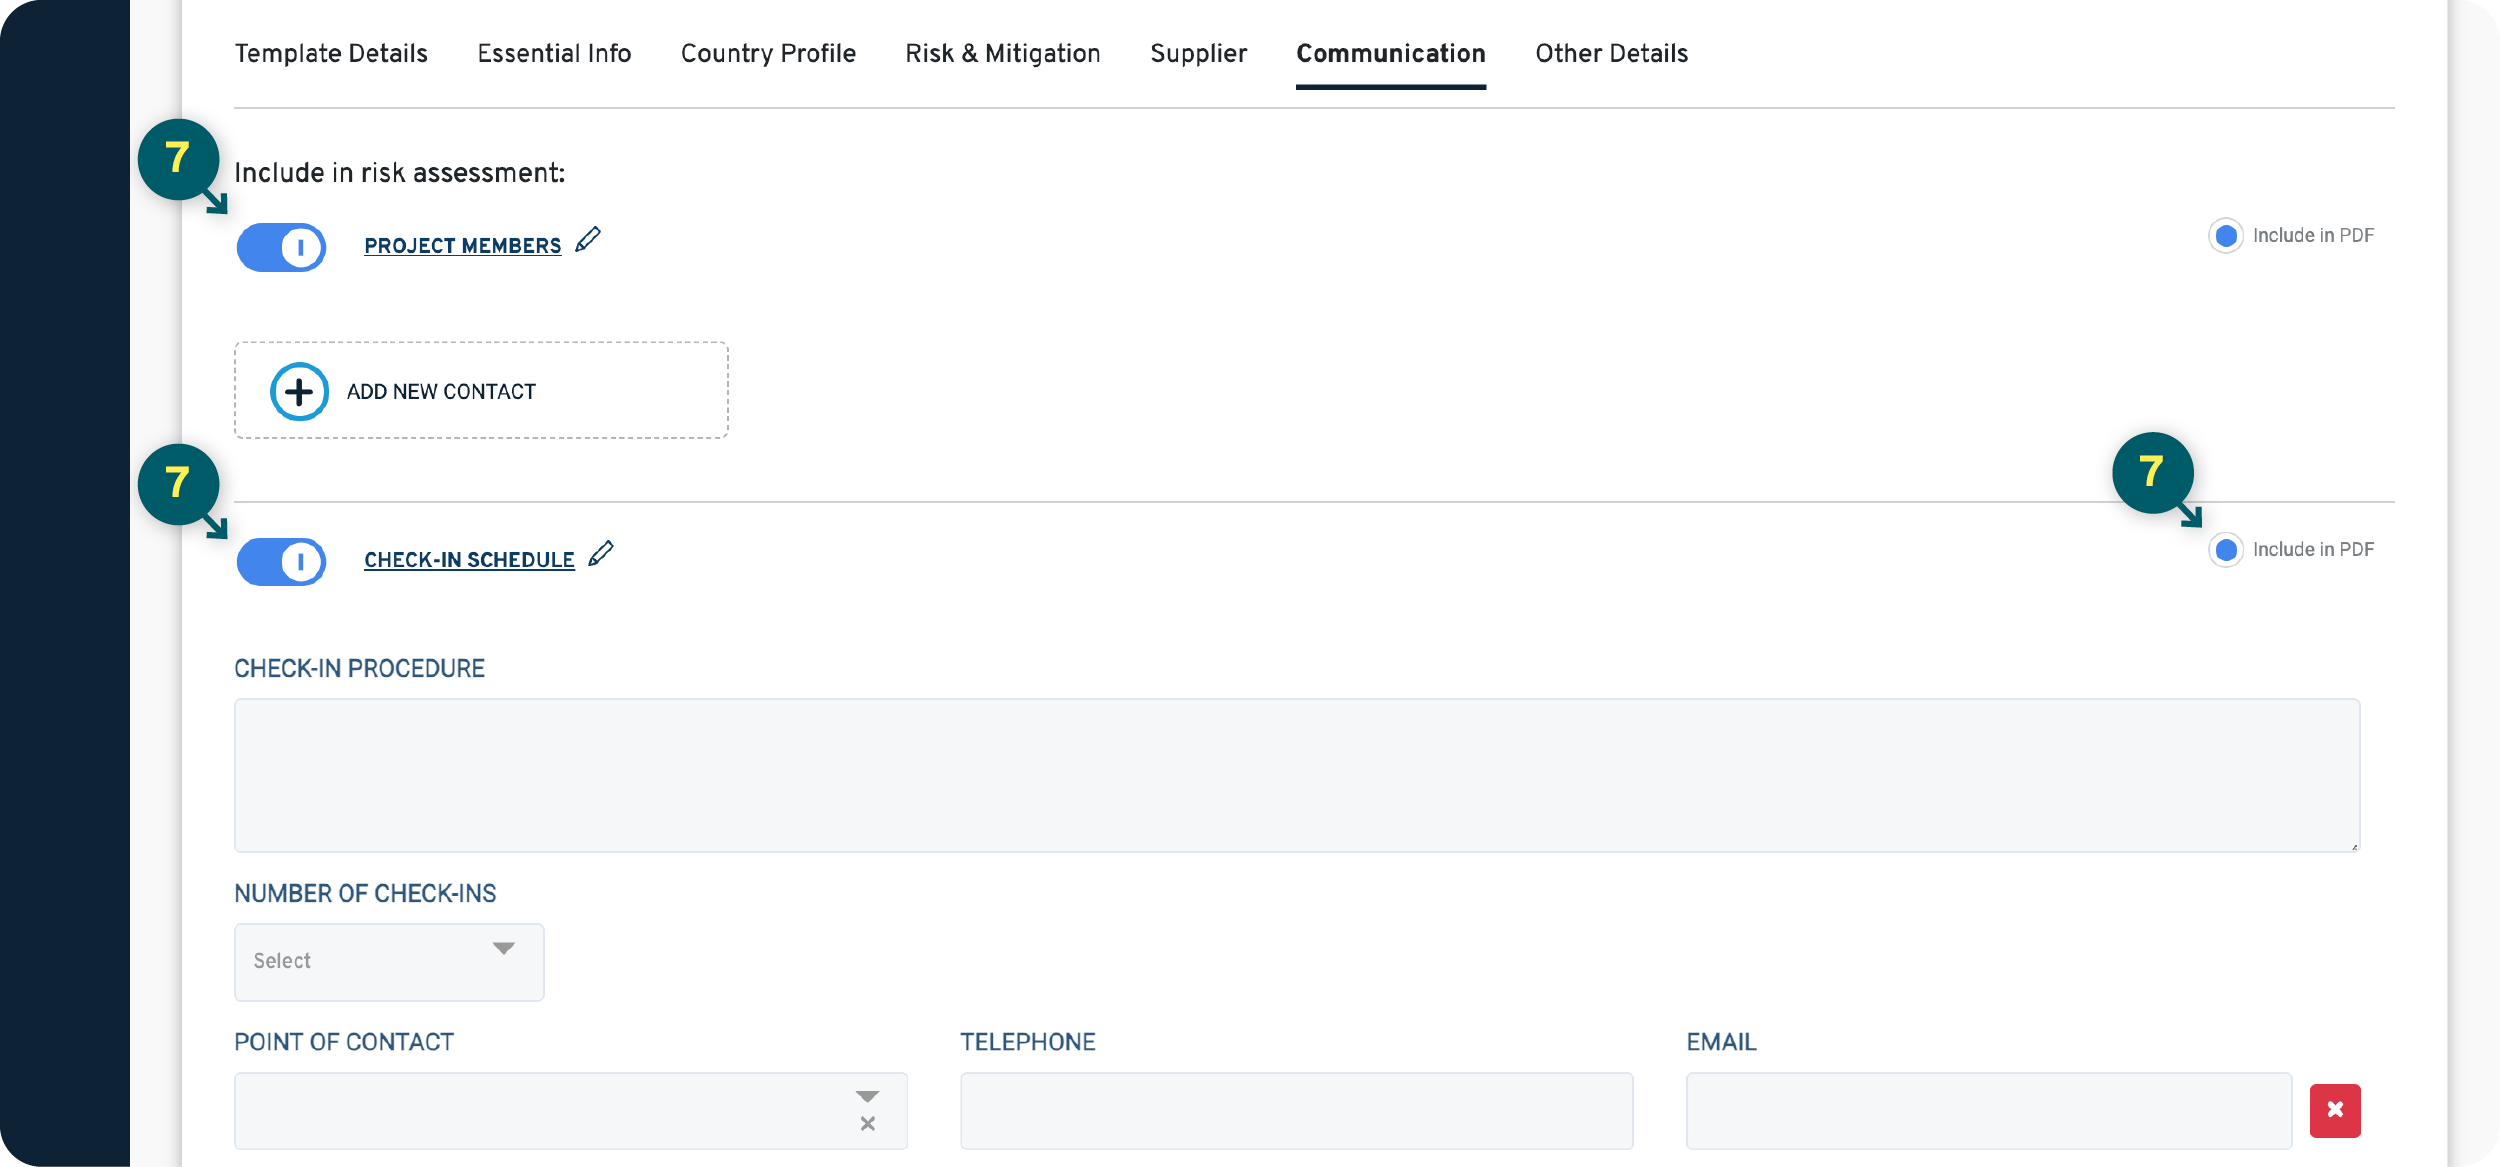
7. In the Communication section, you can add any relevant local contacts, check-in protocols and safety information that you want users to see when completing the risk assessment.
You can select which sections to include in the risk assessment, rename headings and configure if you want them included in the default PDF settings.
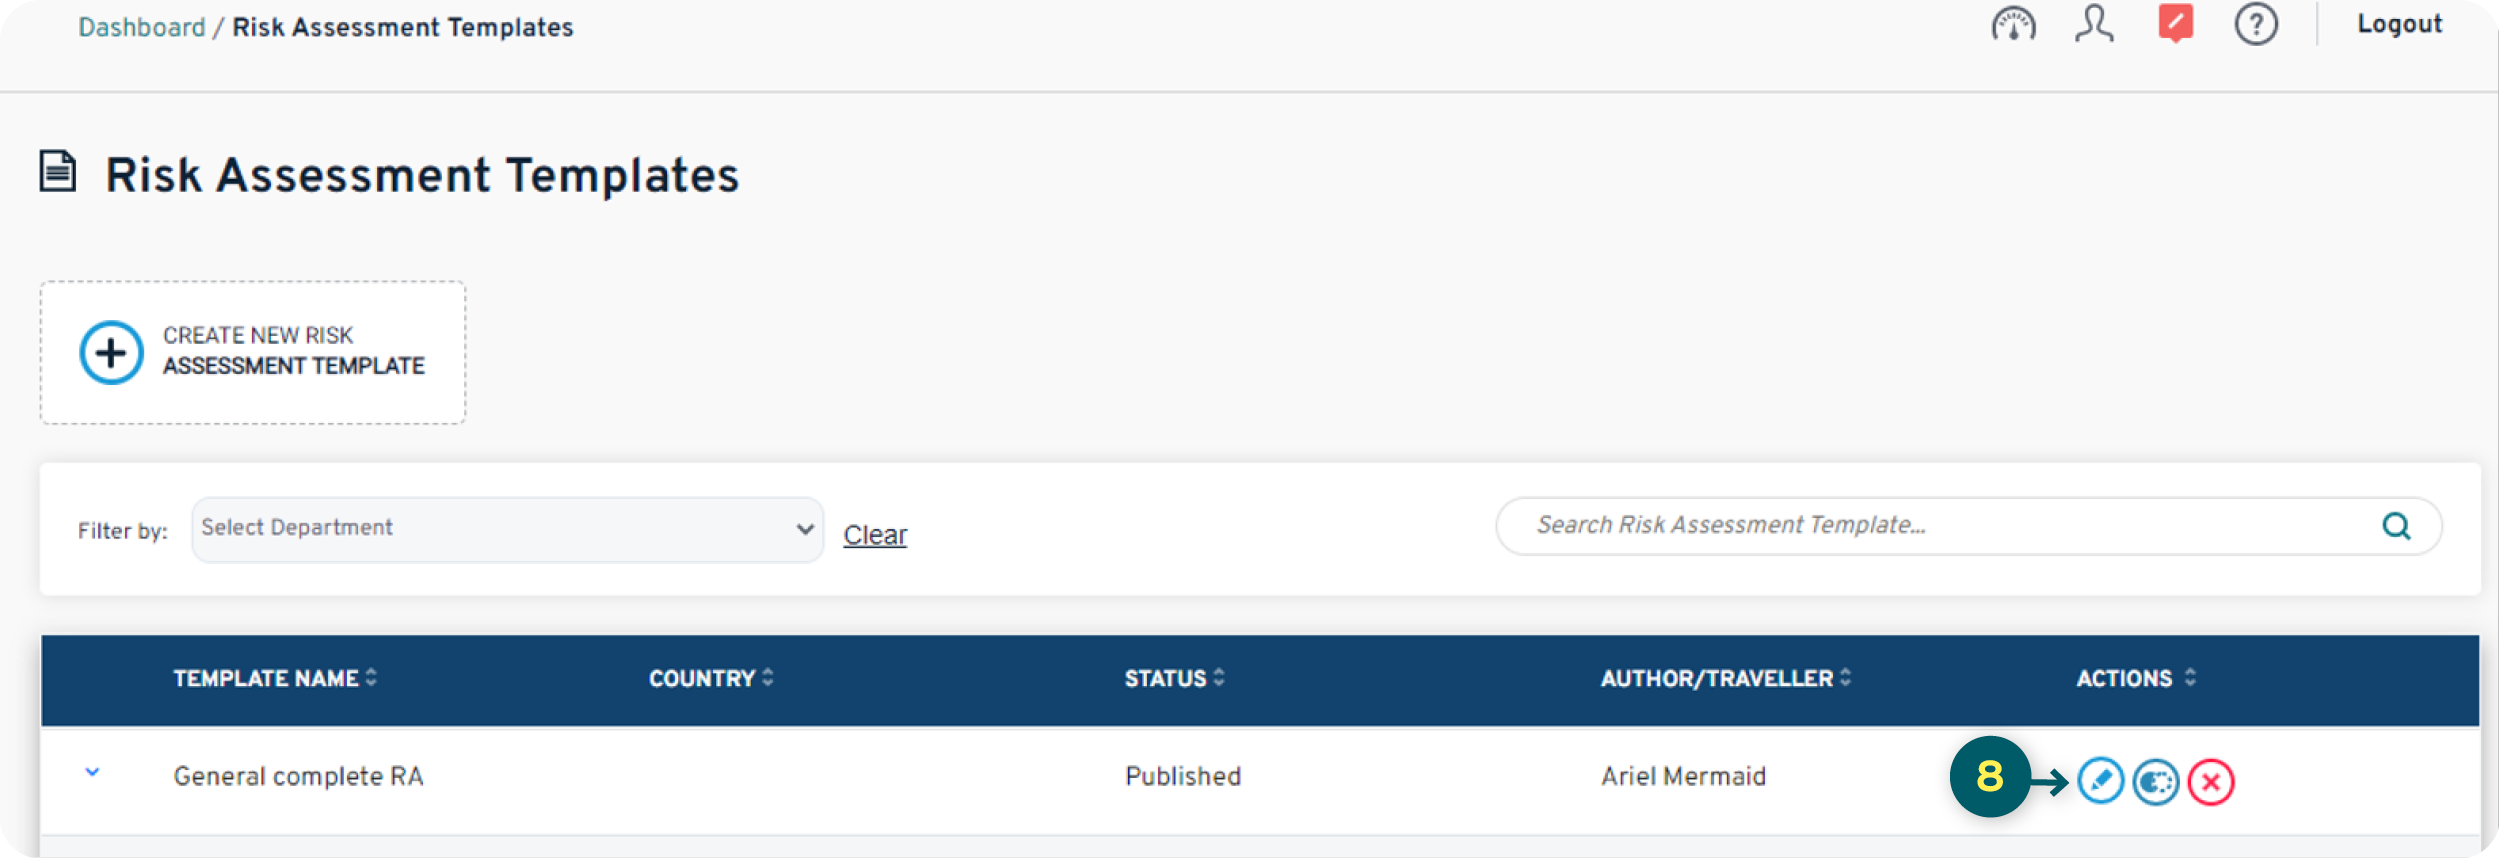
8. In the Template list you can edit any templates by selecting the Edit icon in the Actions column. You can also copy other risk assessment templates.
